
Kong Developer Portal with Okta Open ID Connect (OIDC)
Kong is an open-source API Gateway tool. They also have an enterprise version that provides a developer portal feature. The Kong Developer Portal provides a single source of truth for all developers to locate, access, and consume services. For more details visit: https://docs.konghq.com/enterprise/latest/developer-portal/
Disclaimer: I am not an expert in Okta or Kong. Please choose a security configuration as per your need and your company policies.
Okta Configuration
We are going to set up an application and an authorization server in okta. Before we proceed with that login into your okta admin portal. Following is the step by step guide once you are at the okta admin portal:
Add Application
- Click on
Applicationstab - Click on
Add Applicationbutton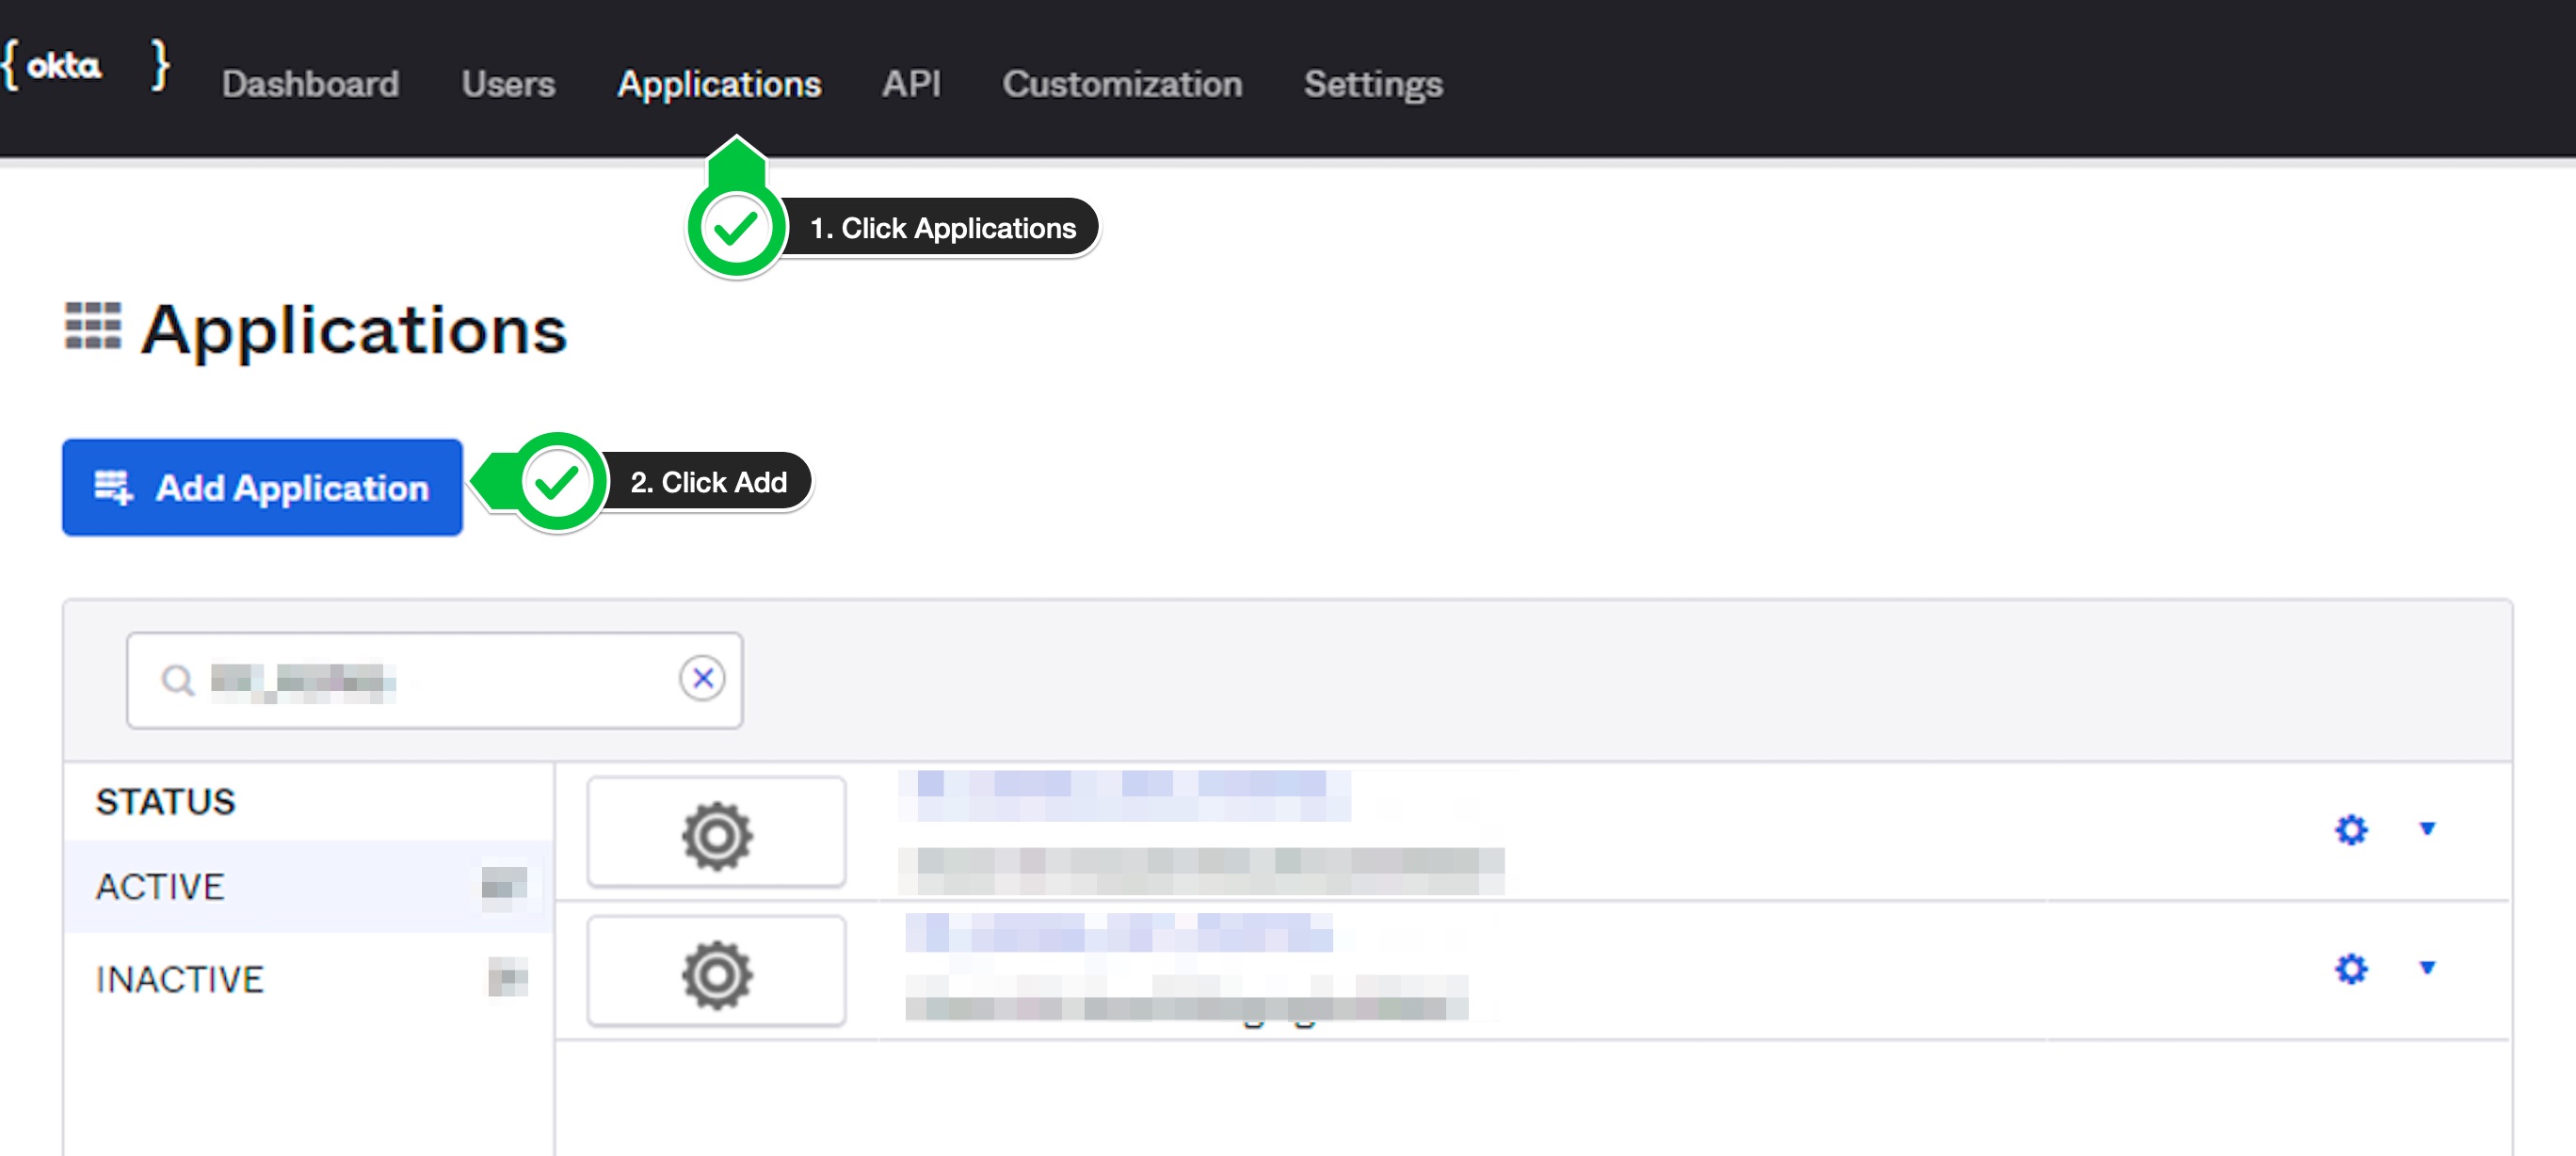
- On the next page, select
Weband click onNext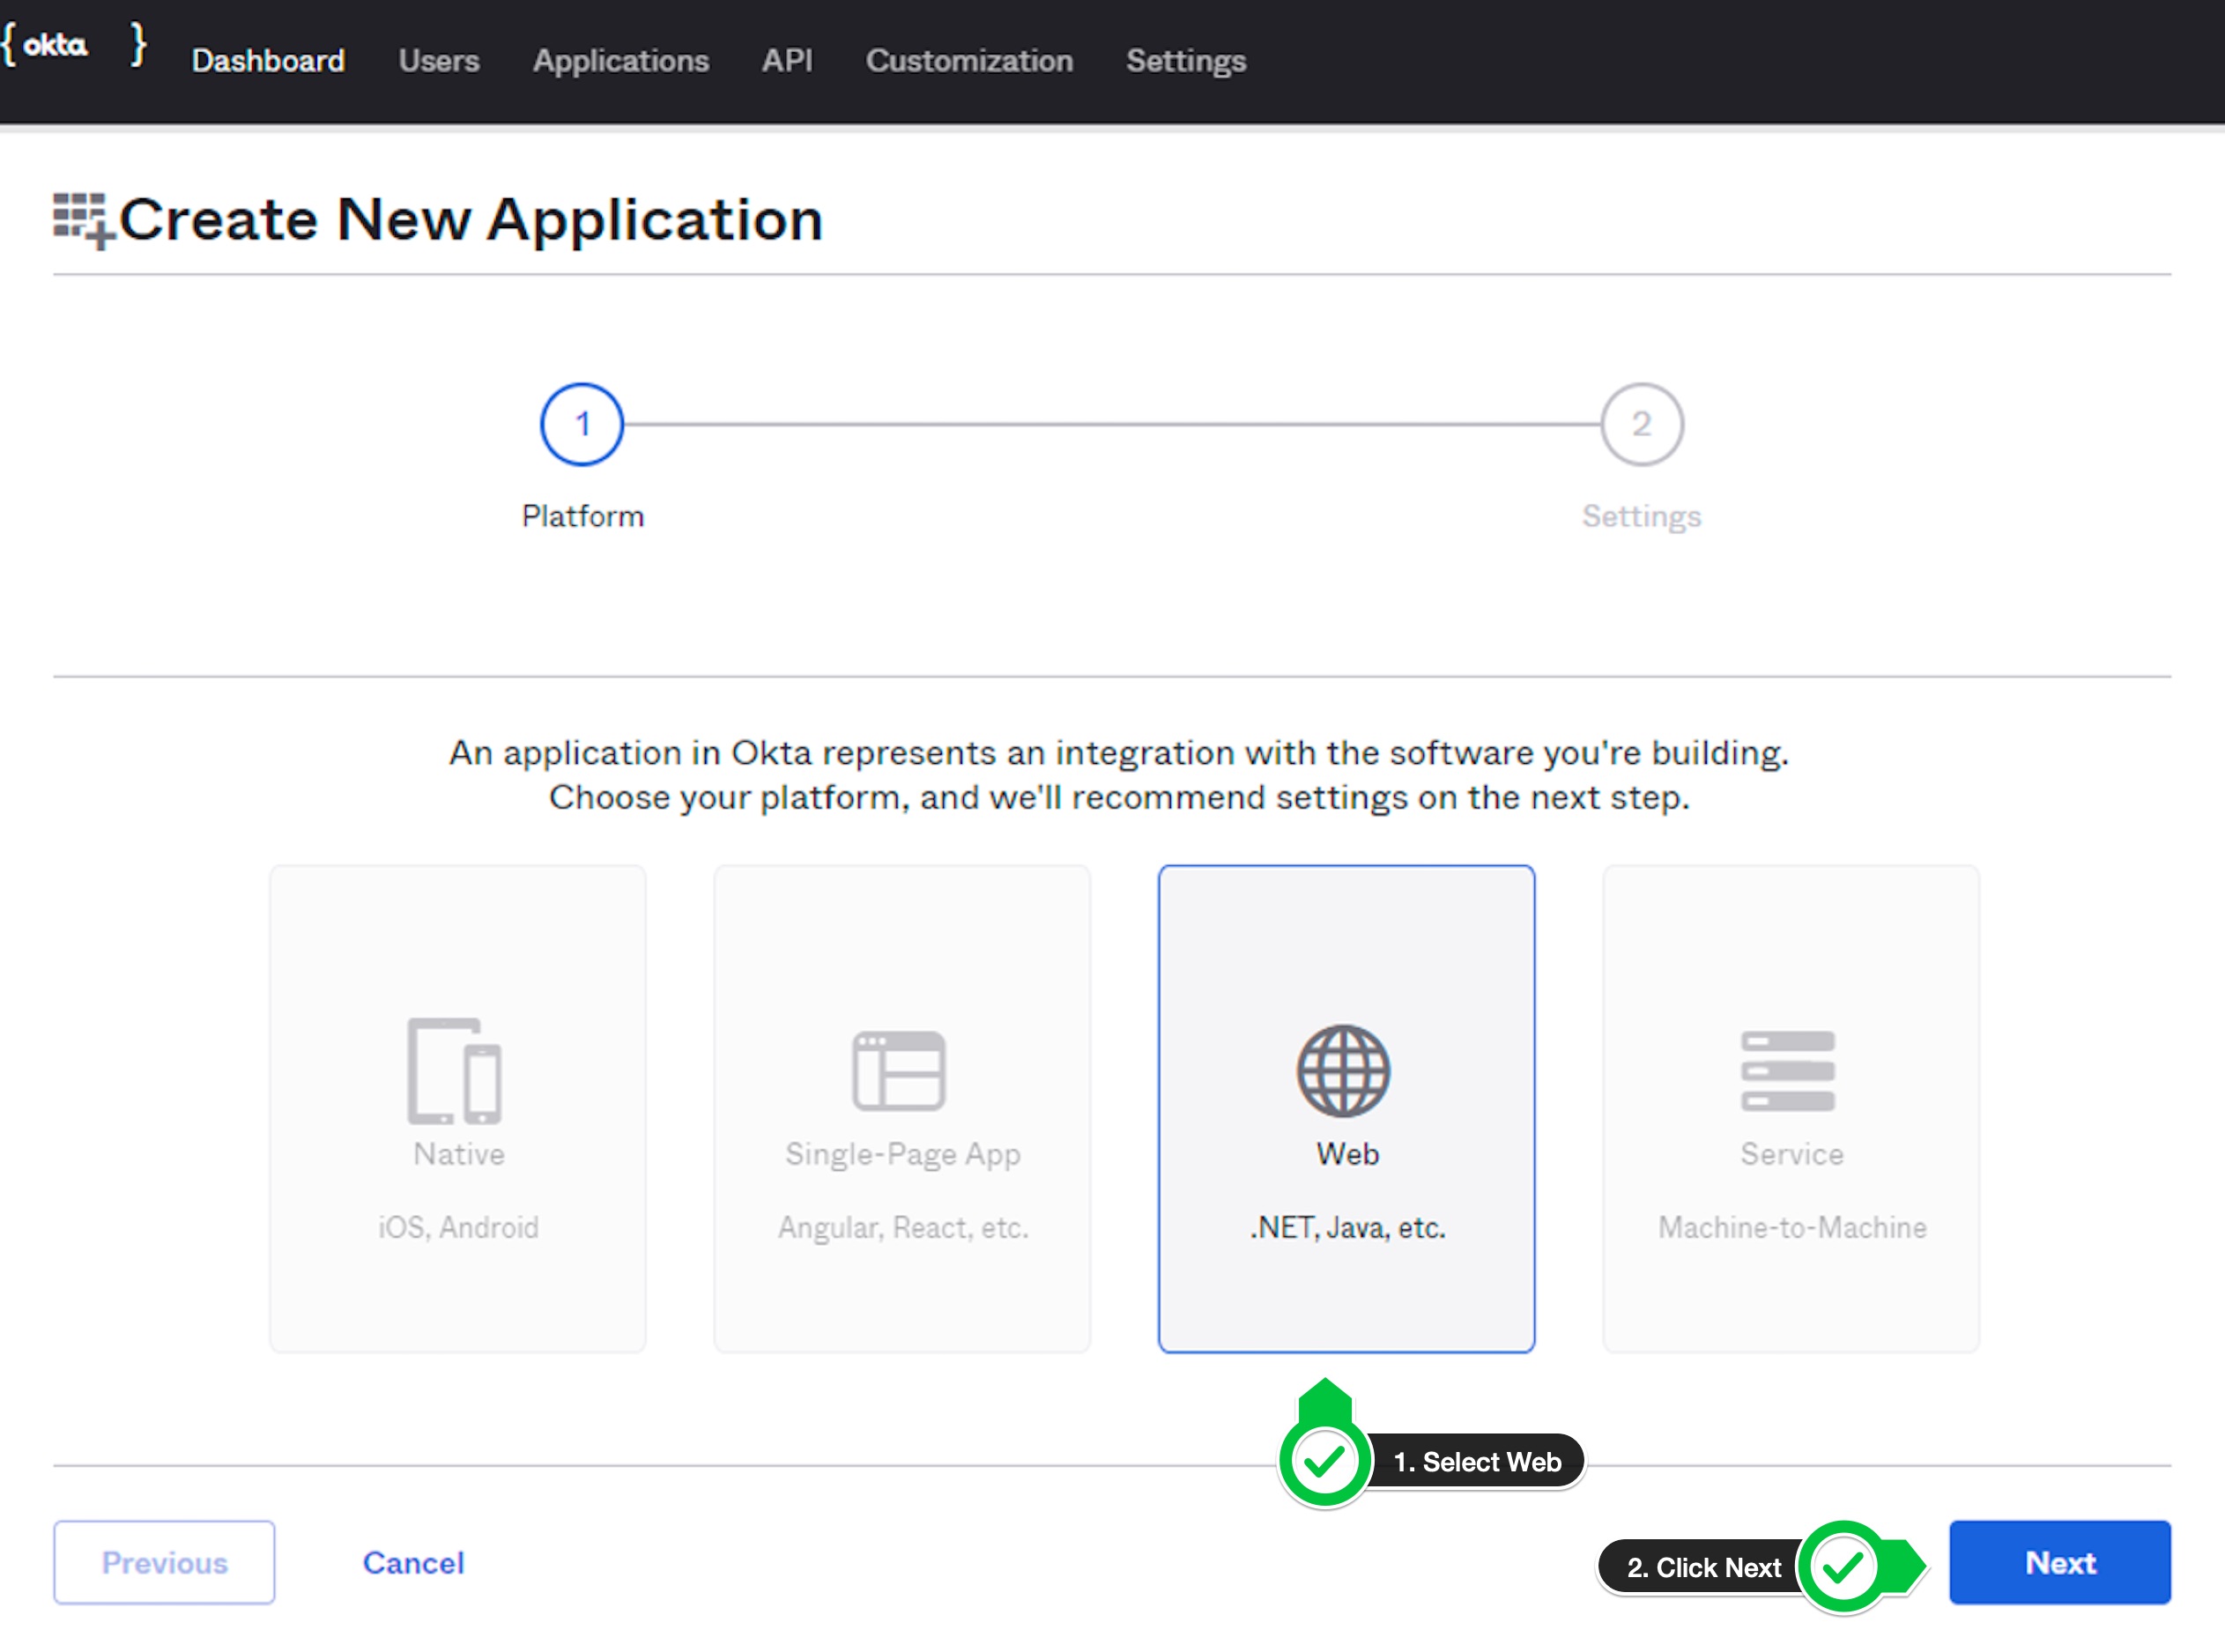
- On the next page, give your application a name. Add a login redirect url which will be something like
https://<control-plane-hostname>:<portal_auth_port>/<workspace_name>/auth. Assign a group to your application and click onDonebutton.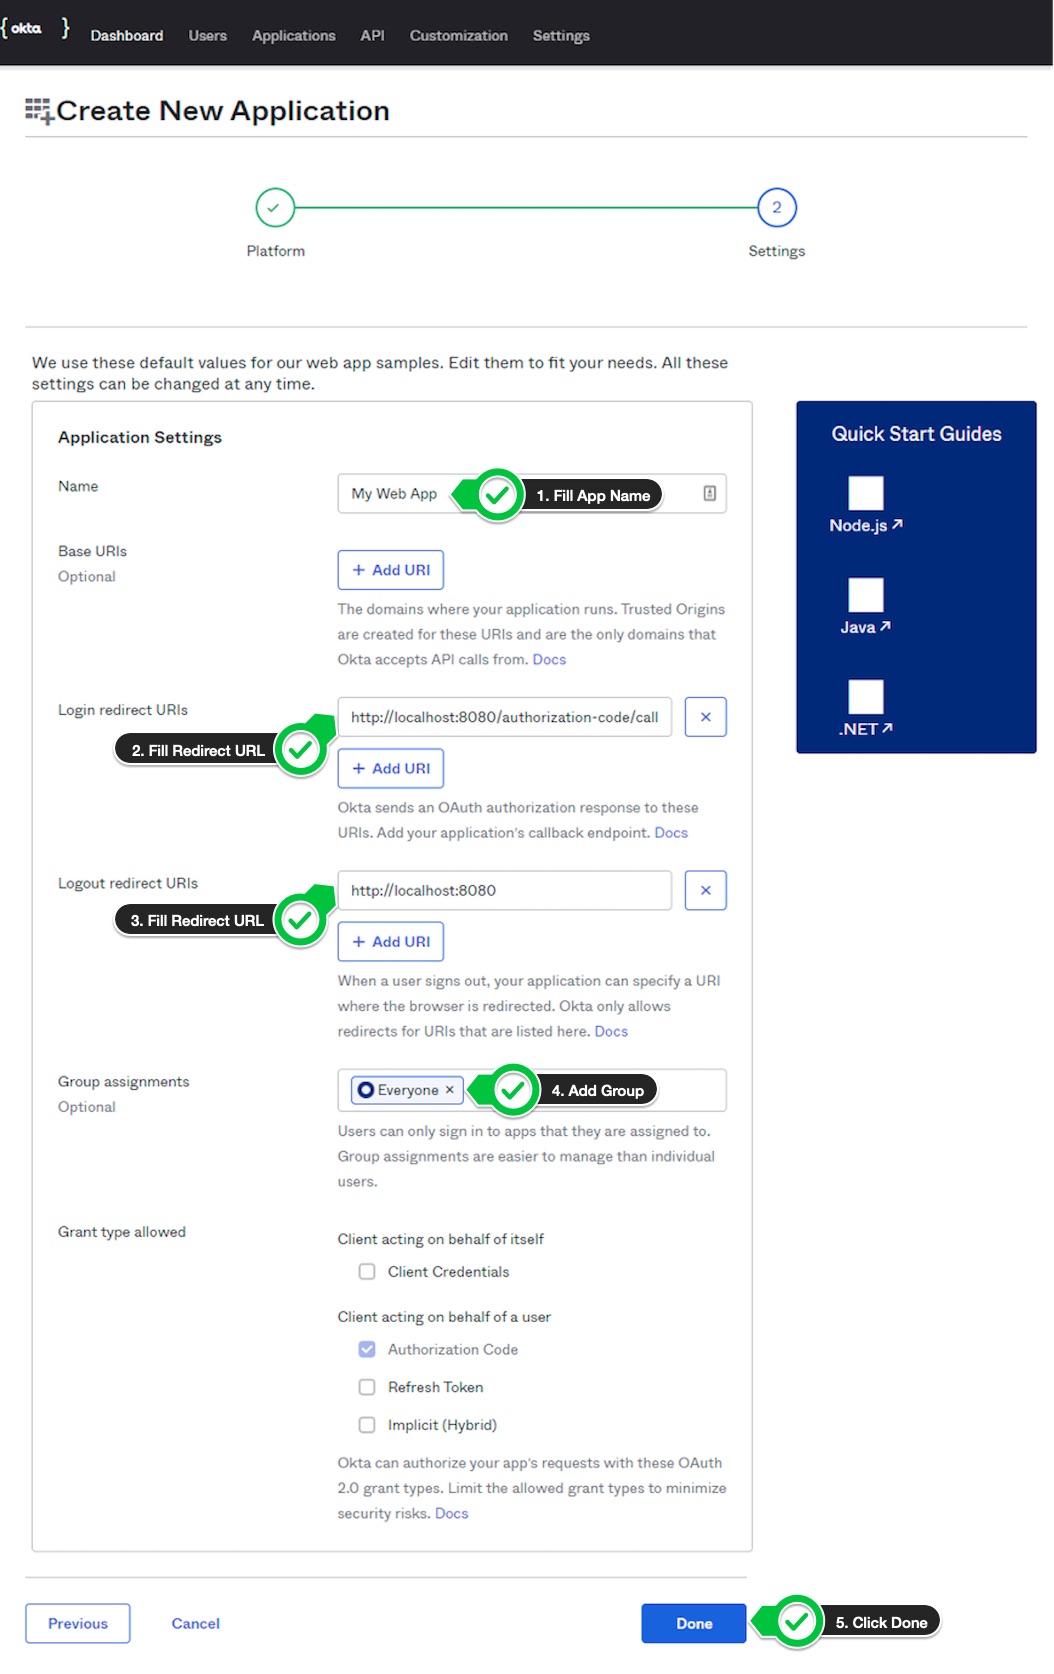
ProTip: You can find portal port and portal auth port from Kong Admin api or console. In order to get the ports make get call to
https://<control-plane-hostname>:<admin_api_port>/<workspace_name>/kong. Usually, if dev portal port number is 8442 then portal auth port number would be 8443. -
On the next page, verify that you have correct values for all the URIs in
LOGINsection. In my case, all three have same value.Also, note down
Client IDandClient Secret, we need those when creating kong OIDC config.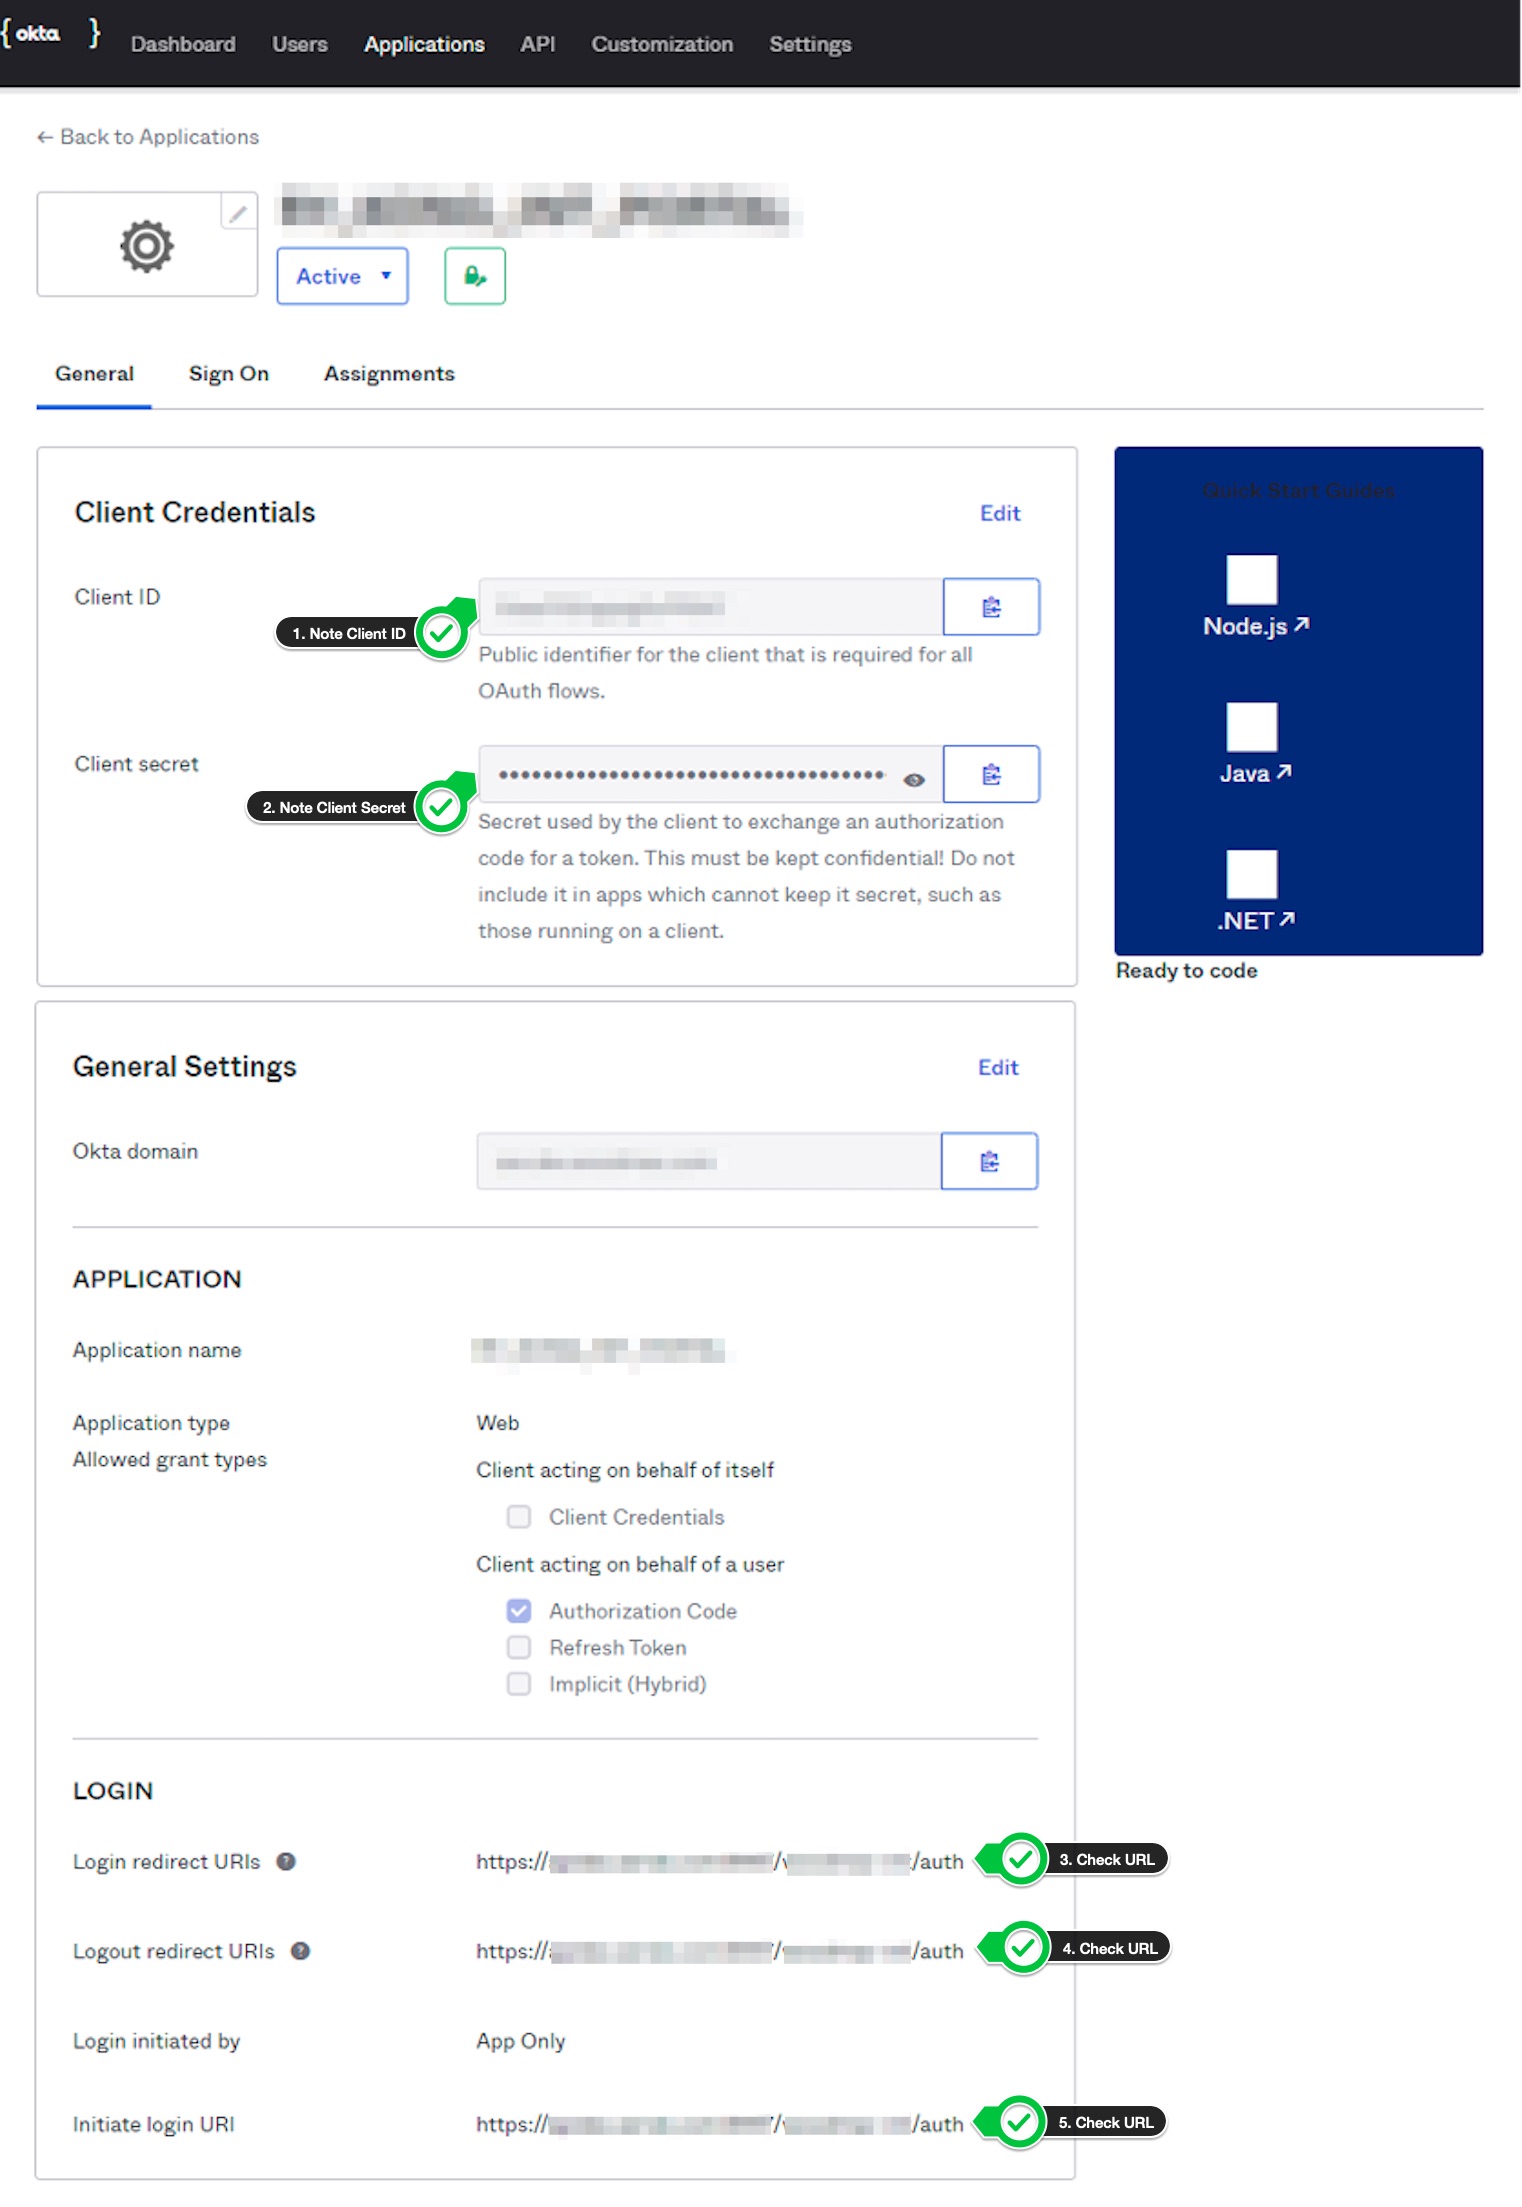
- That’s all for adding an application.
User Attributes
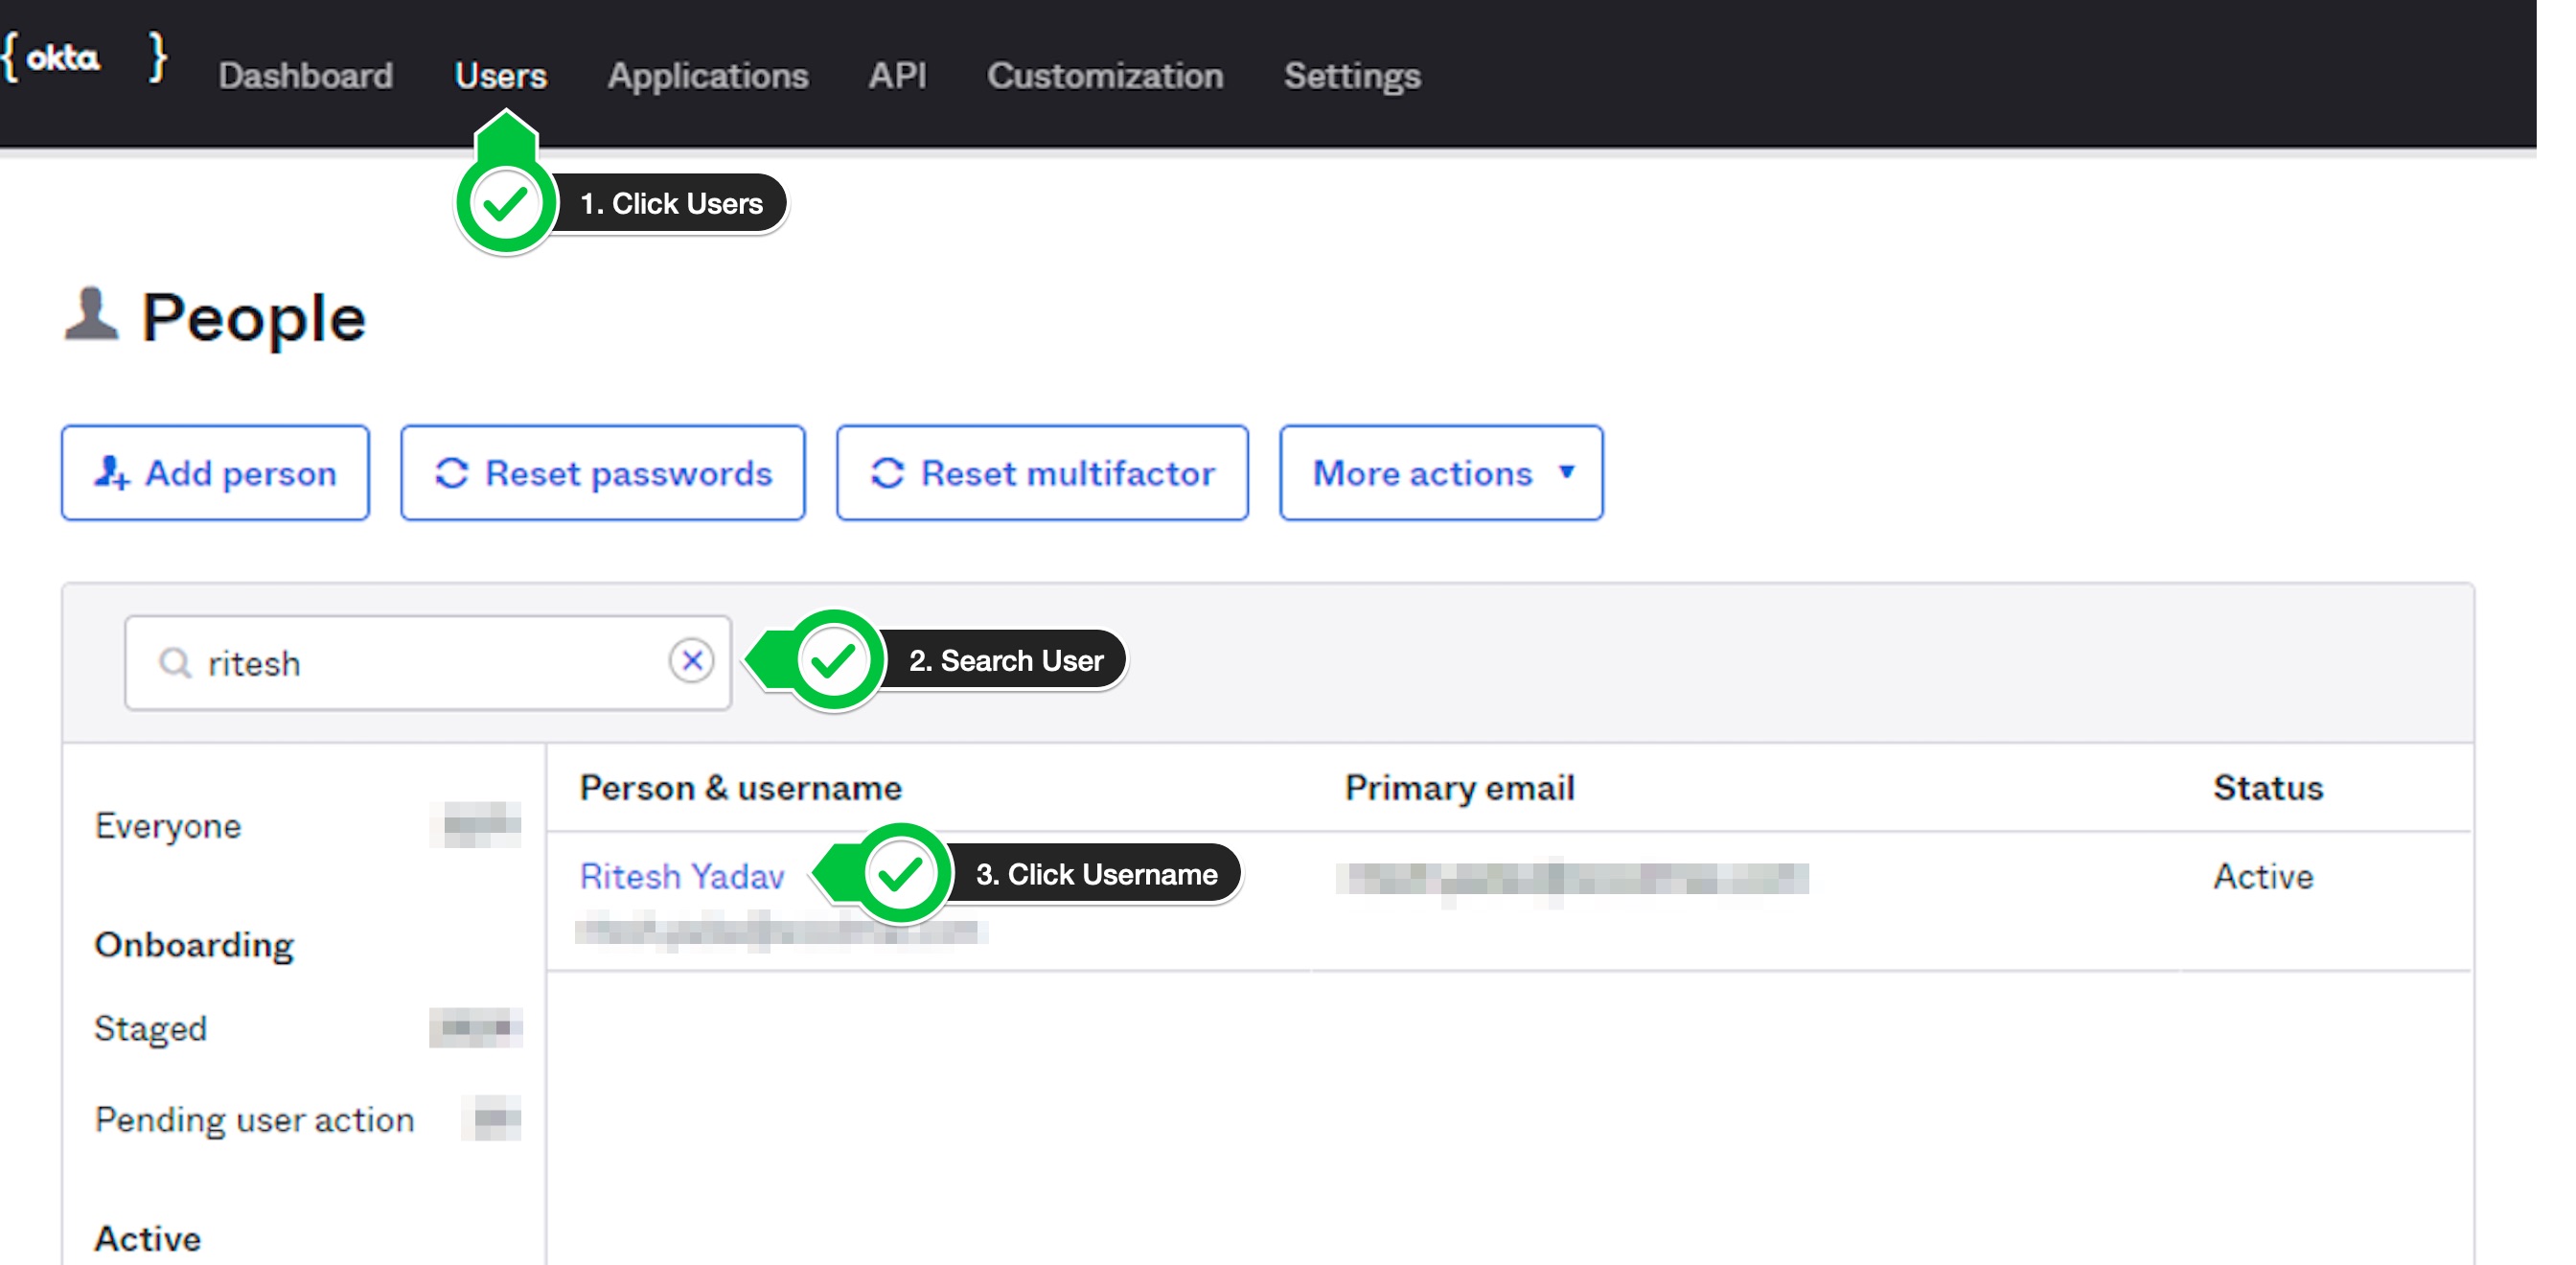
- Click on the
Userstab. - Search for a user in the search box.
- Click on the username link.
-
On the next page, click on the
Profiletab and check the attribute of the email address field.In my case, it was
login. This is the value, we are going to use as claim in authorization server.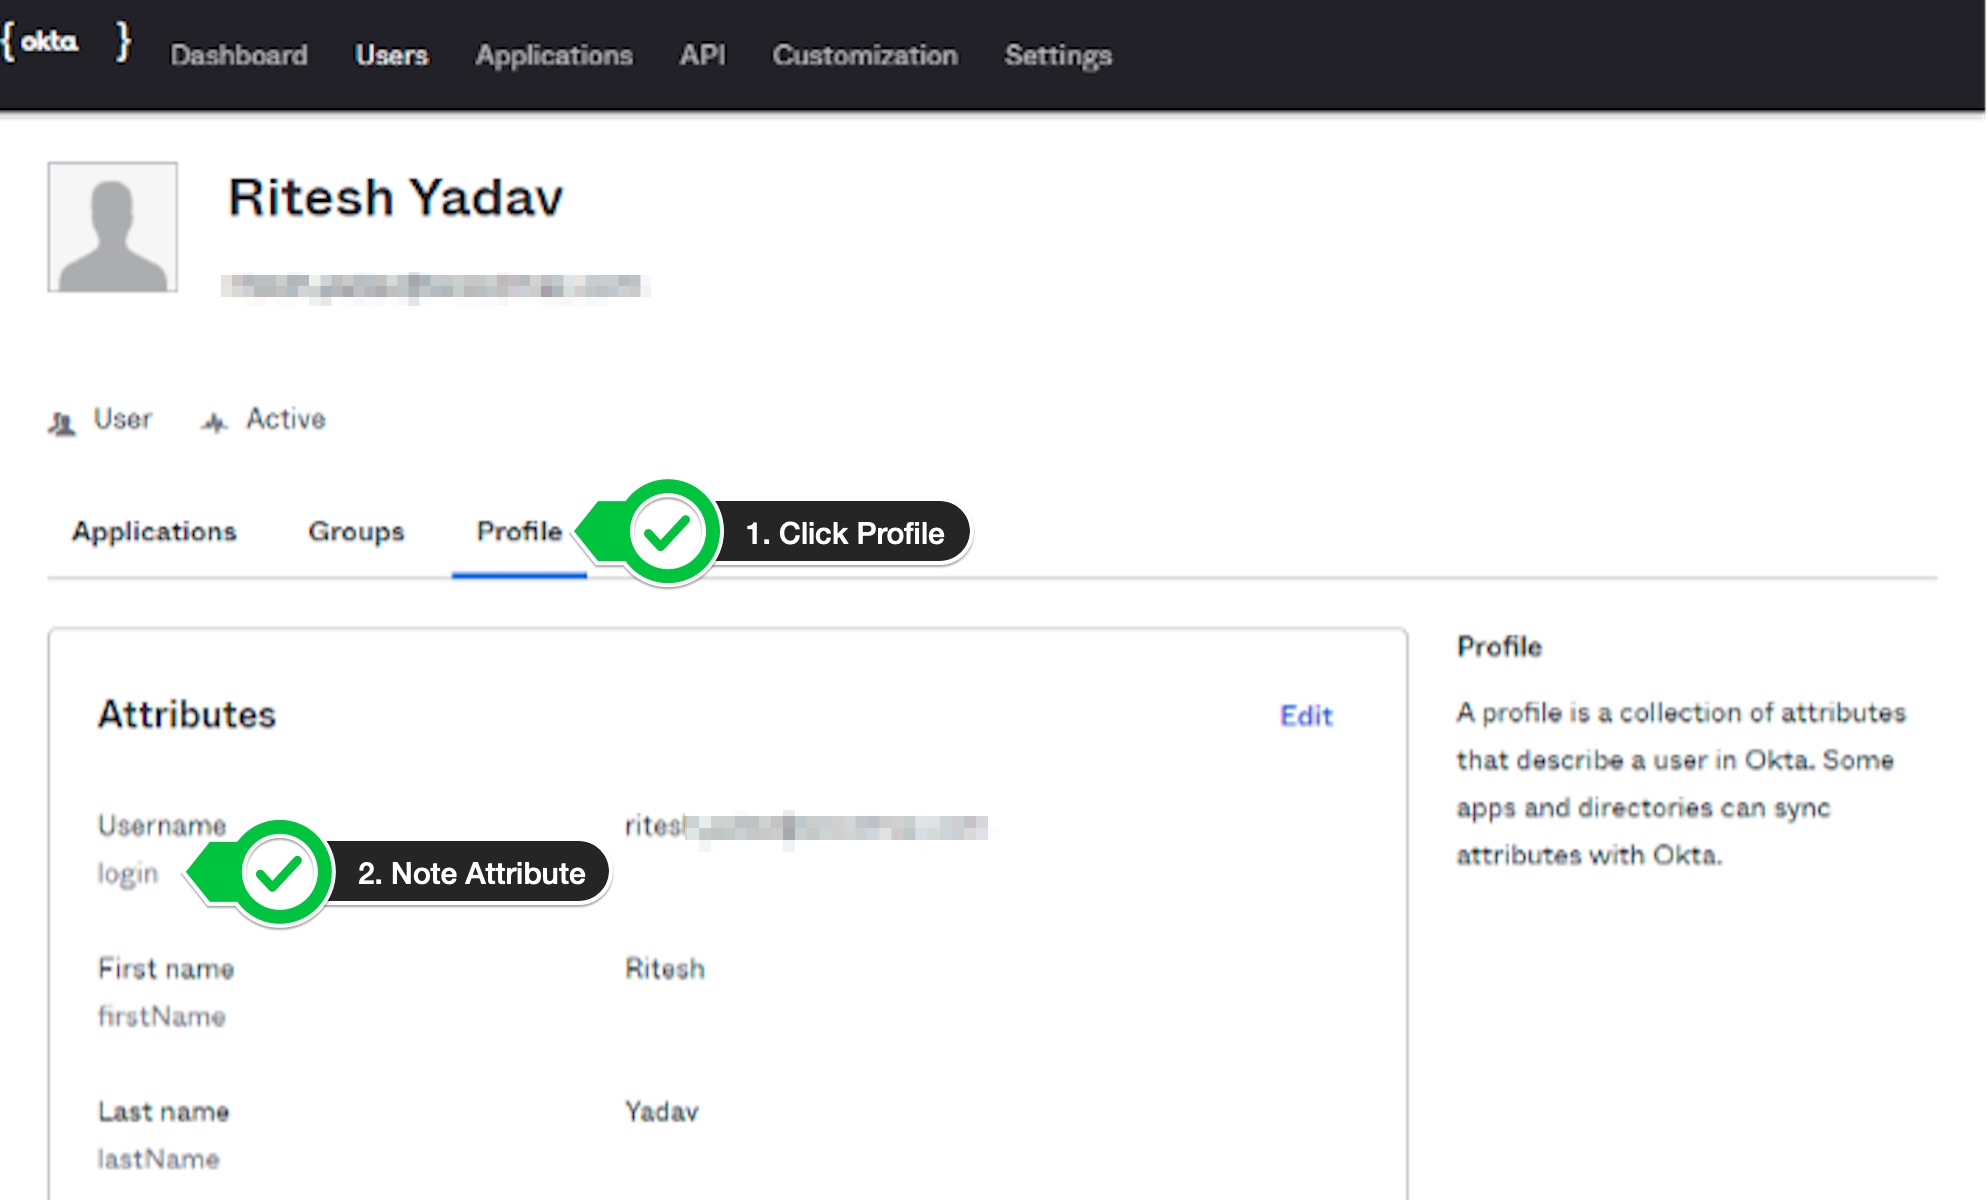
Add Authorization Server
- Click on the
APItab. - Click on
Authorization Serversoption.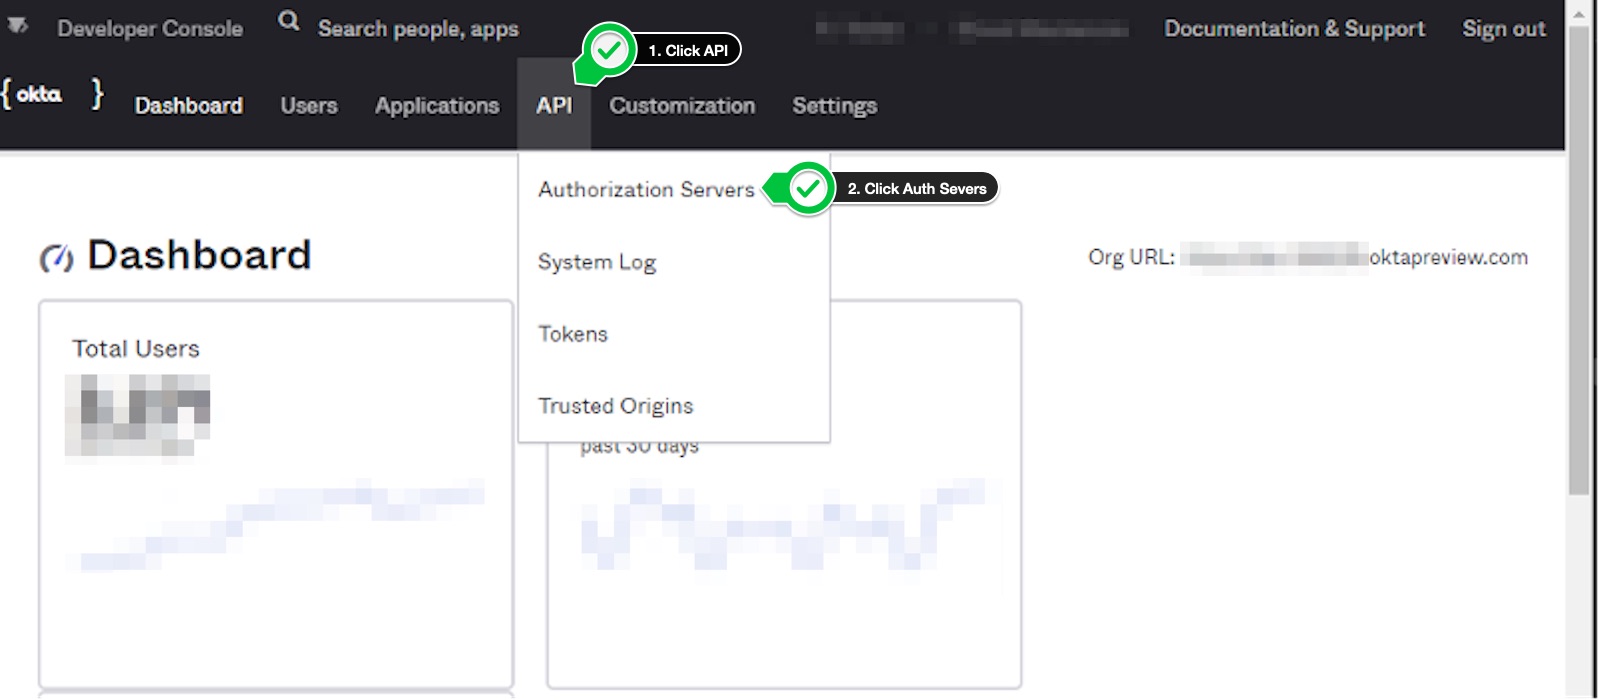
- Click on
Authorization Serverstab. - Click on
Add Authorization Serverbutton.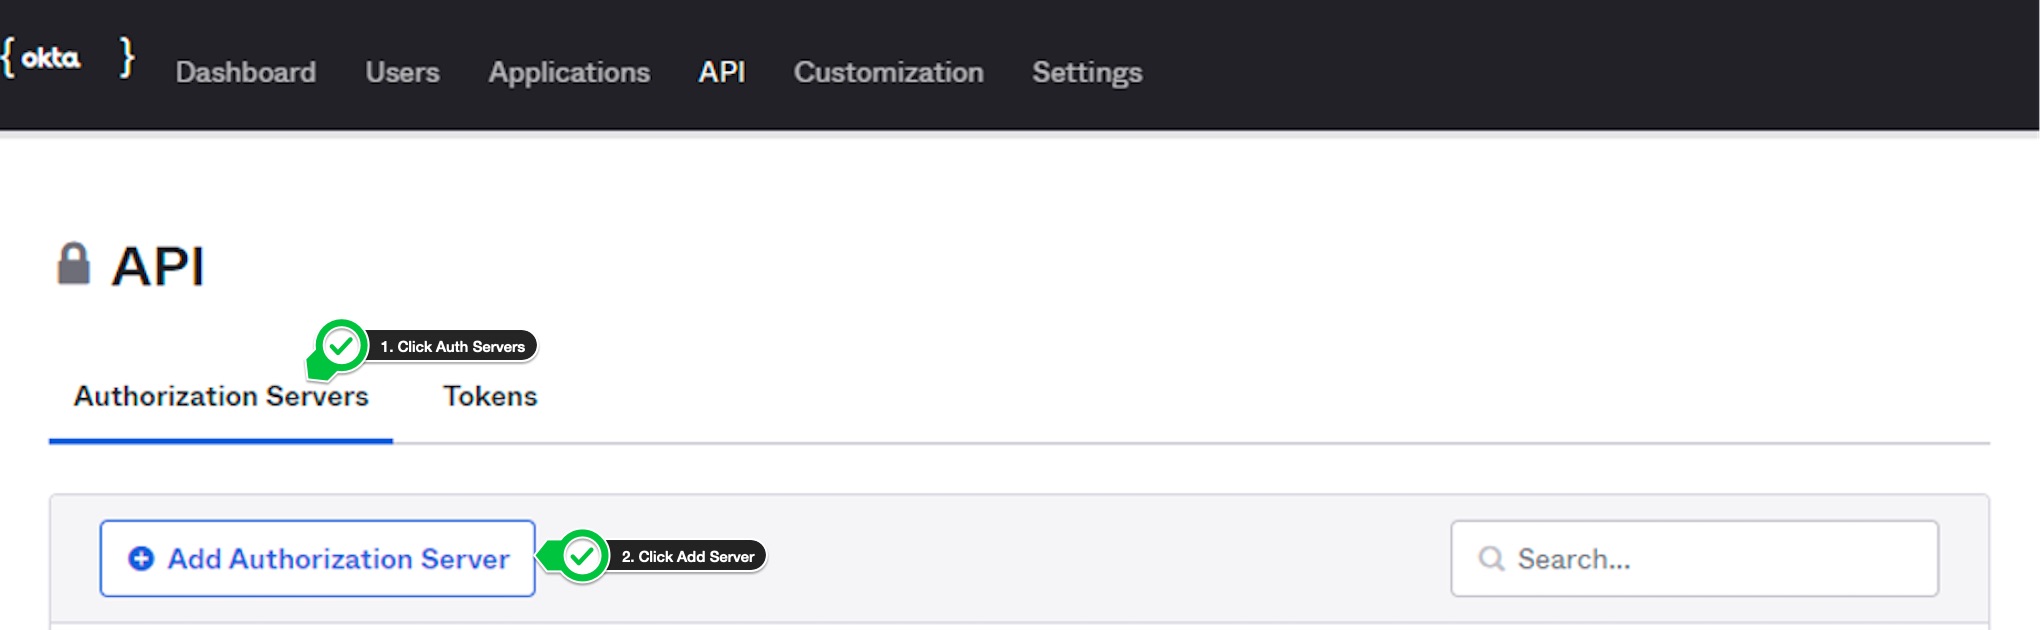
- Fill authorization server
Name,AudienceandDescriptionwith any sensible value. Click onSave.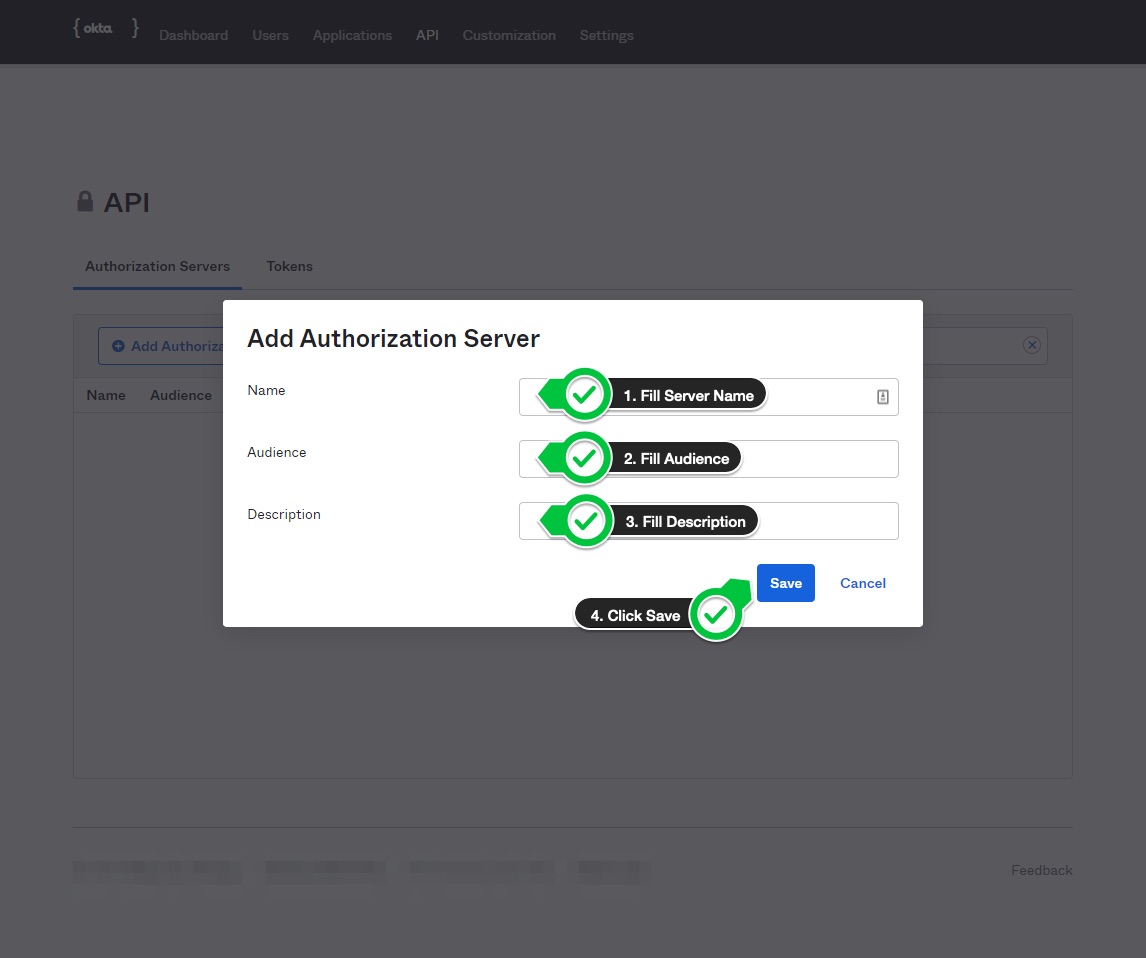
-
On the next page, click on the
Settingstab.Note down the
Custom URLof theIssuer.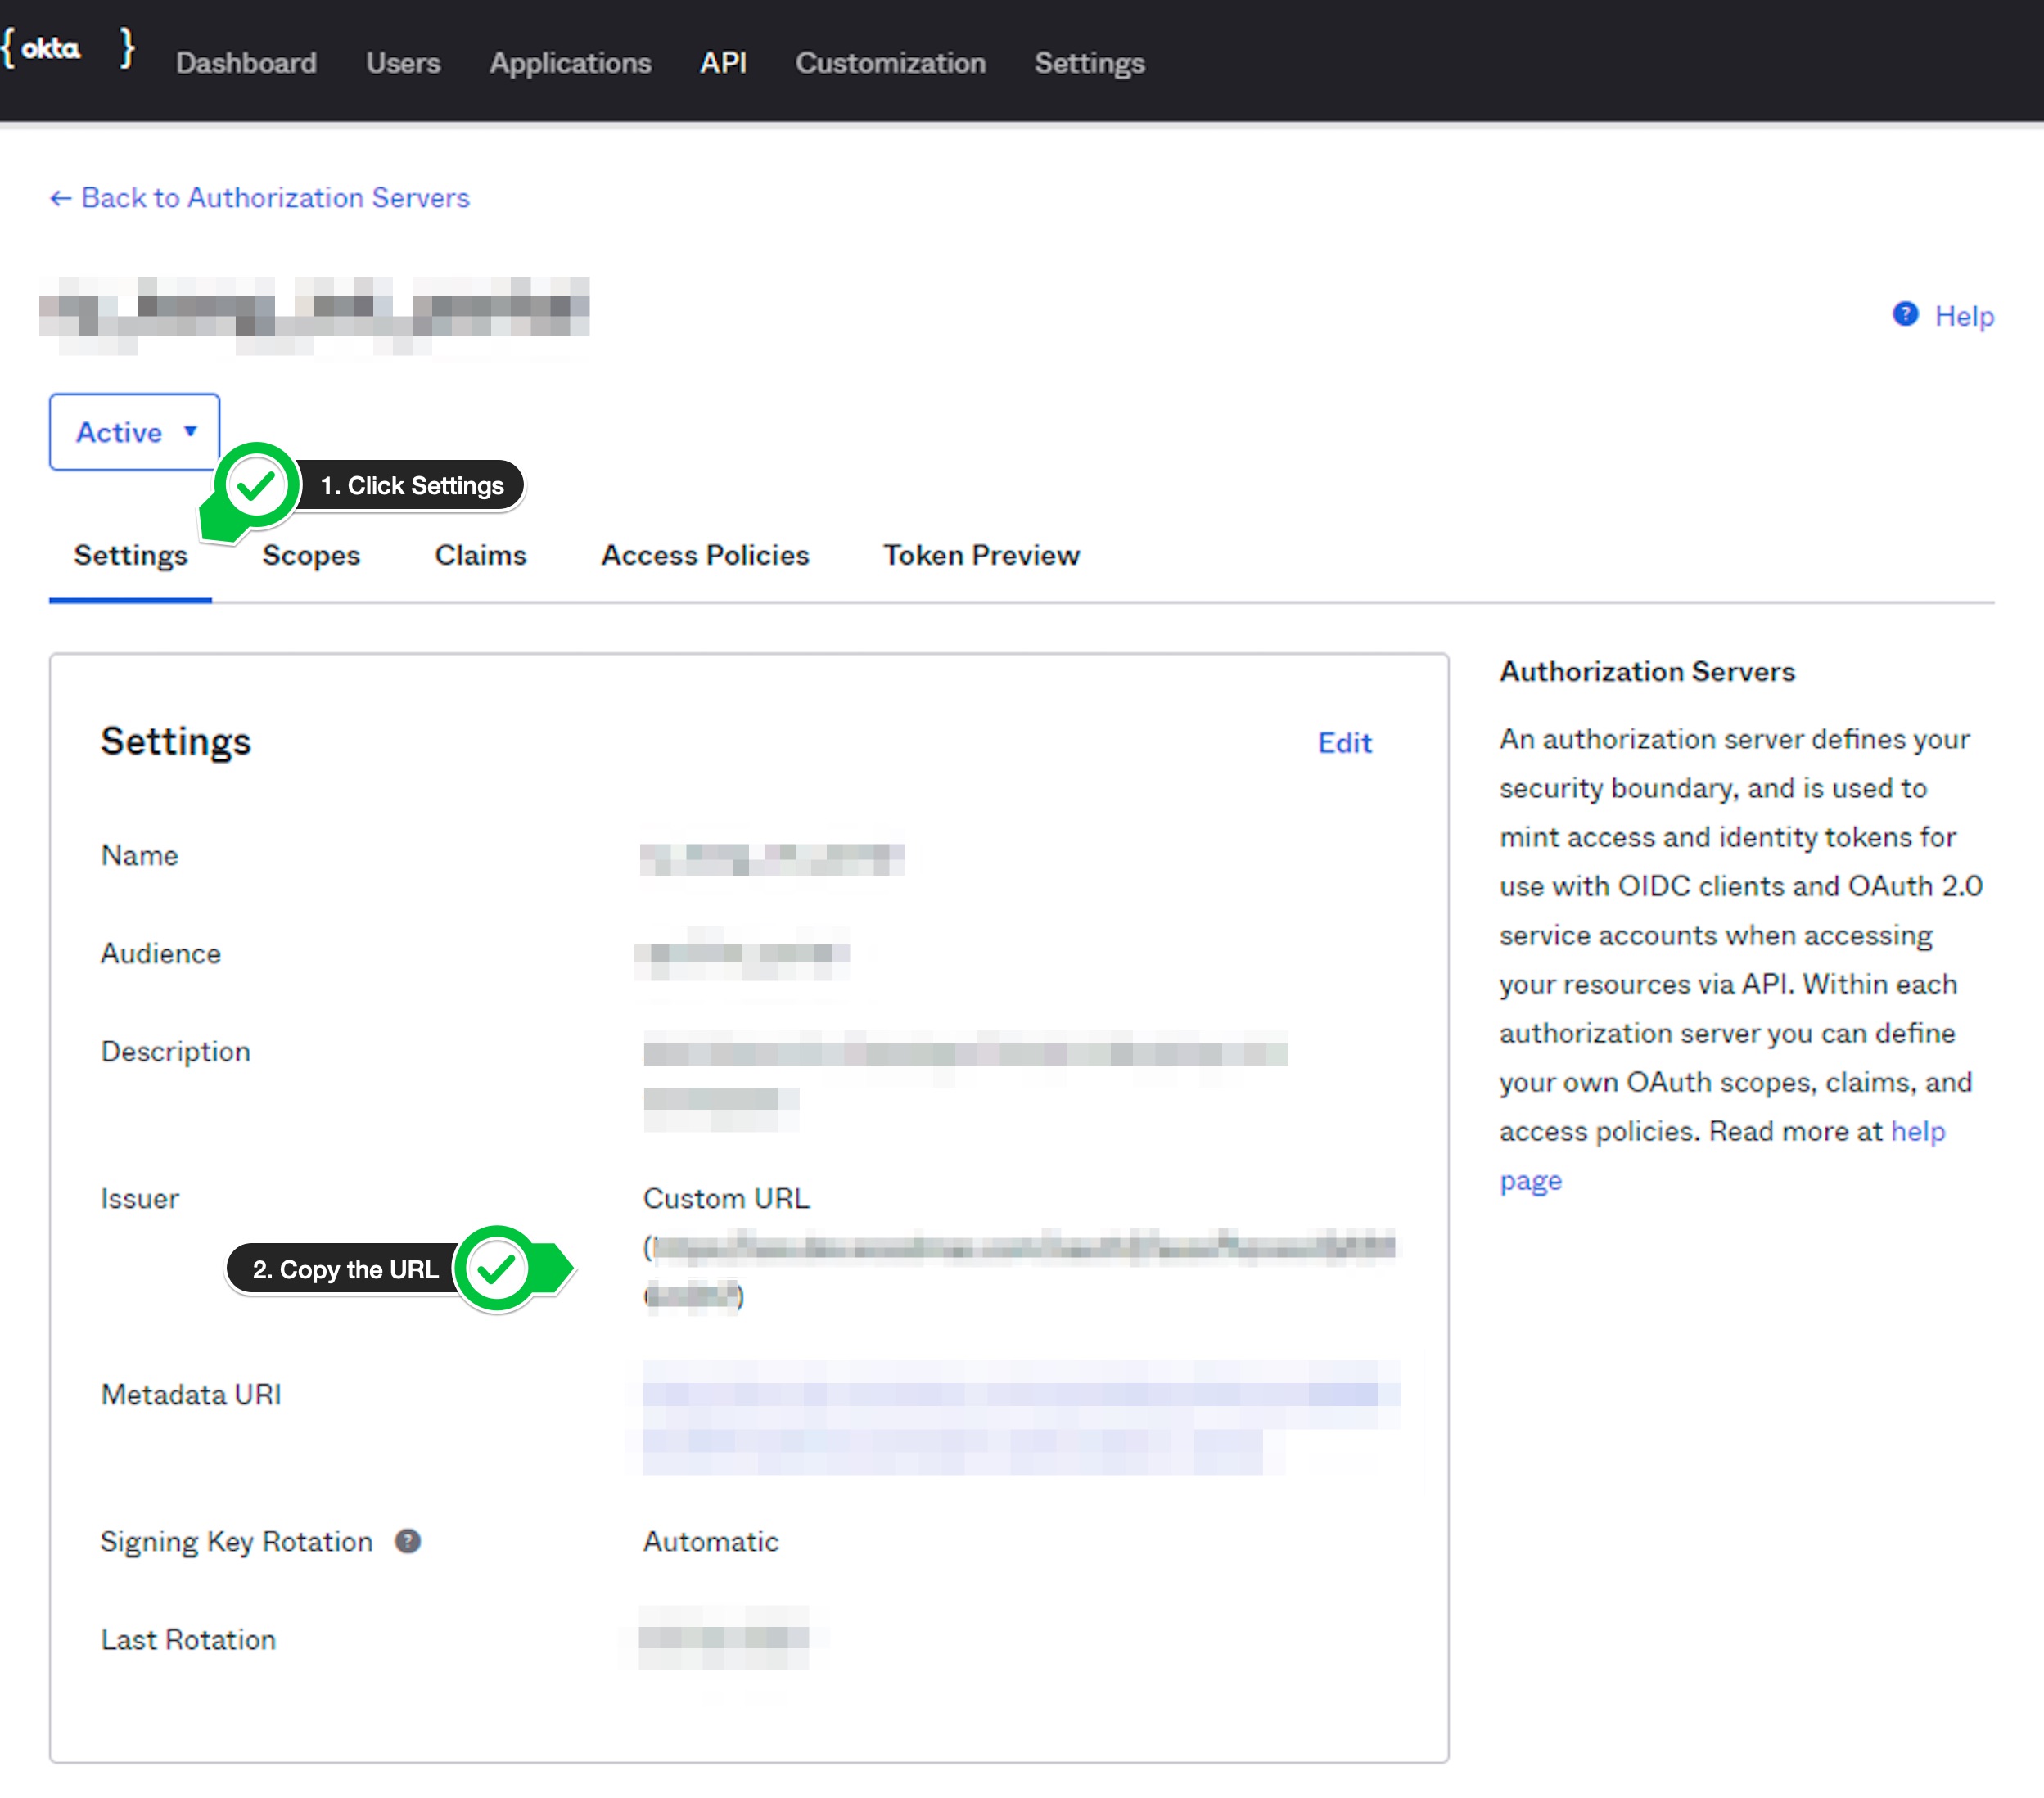
- Click
Access Policiestab. - Click
Add New Access Policybutton.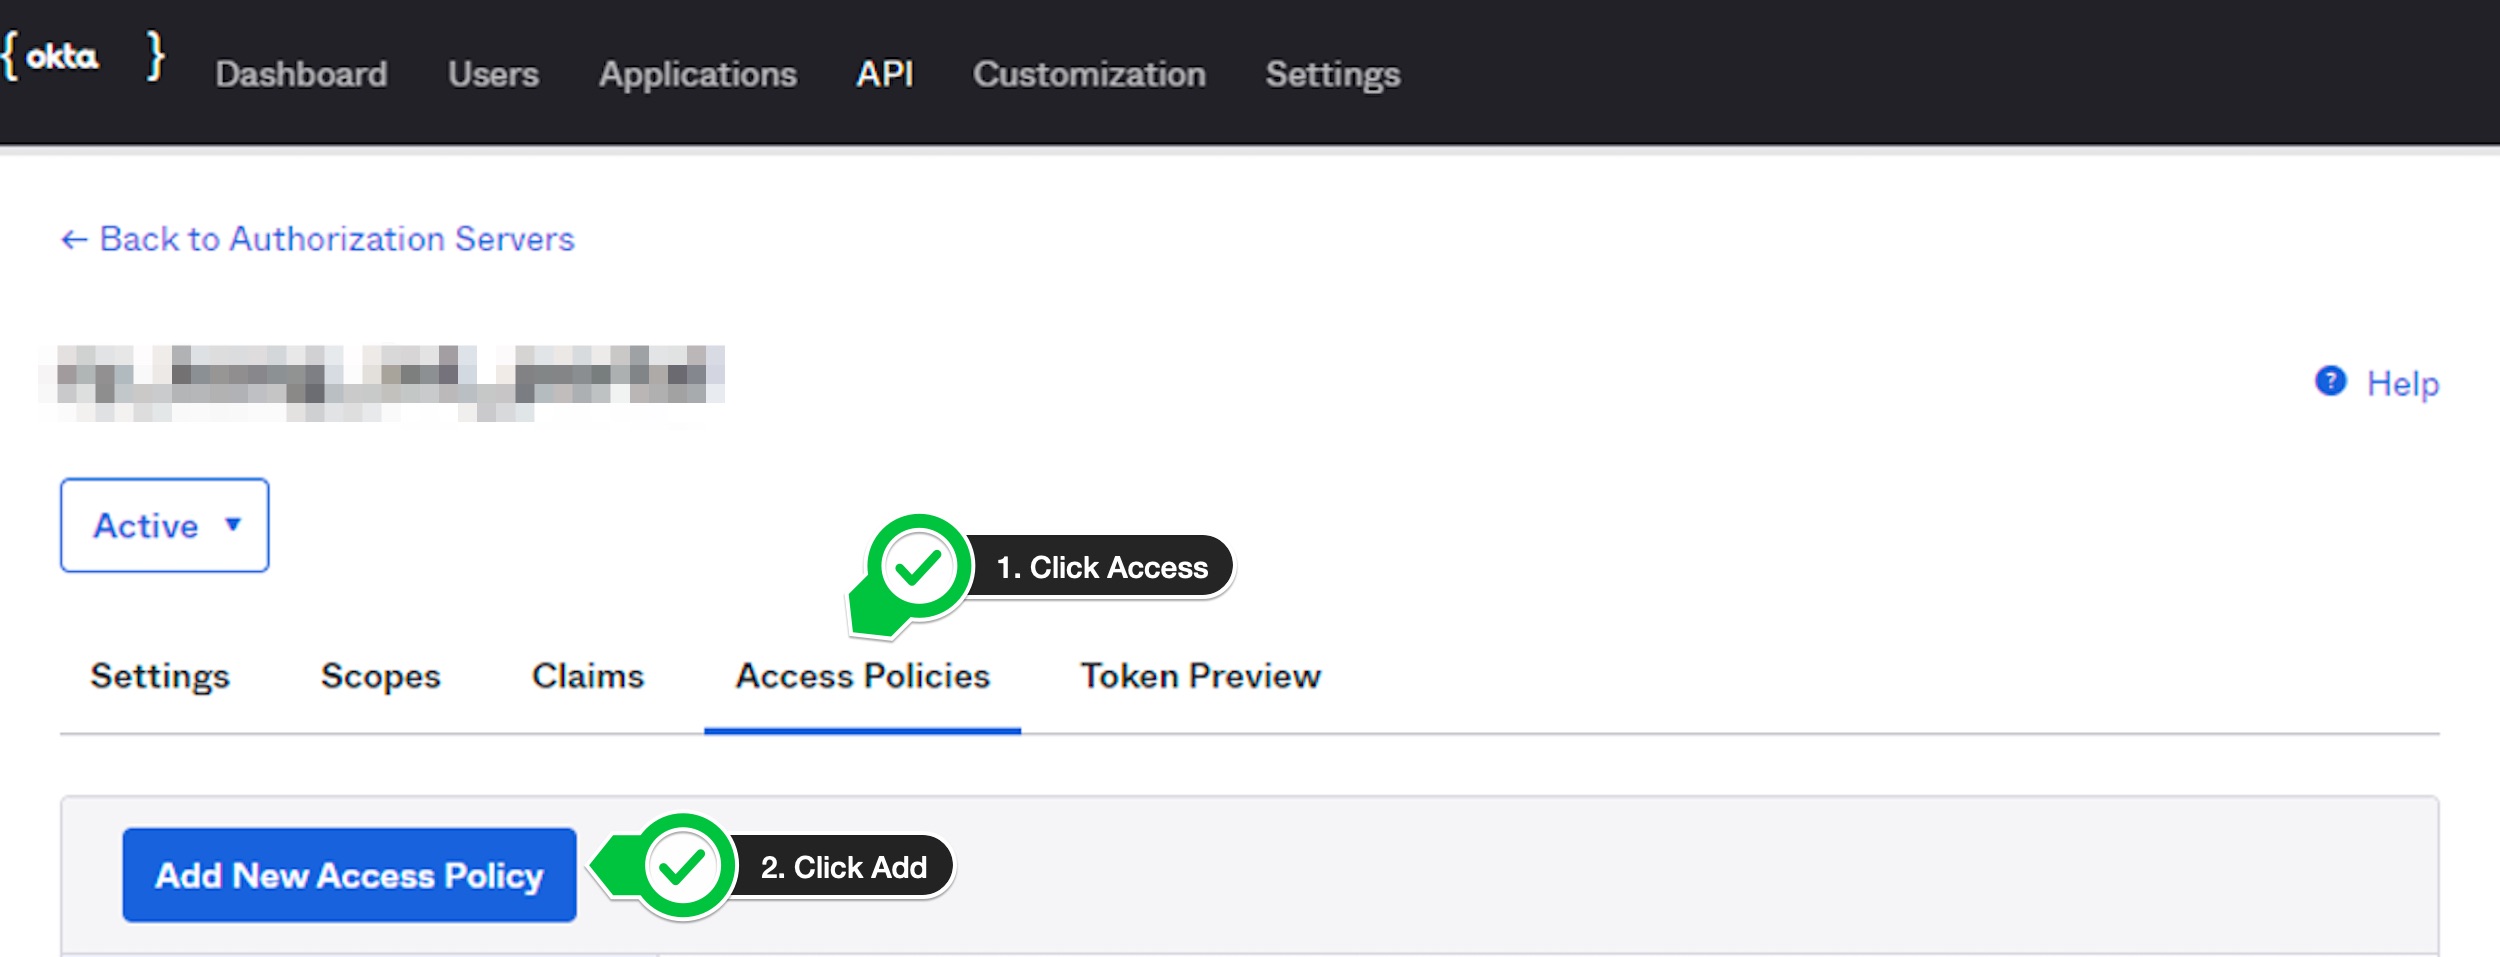
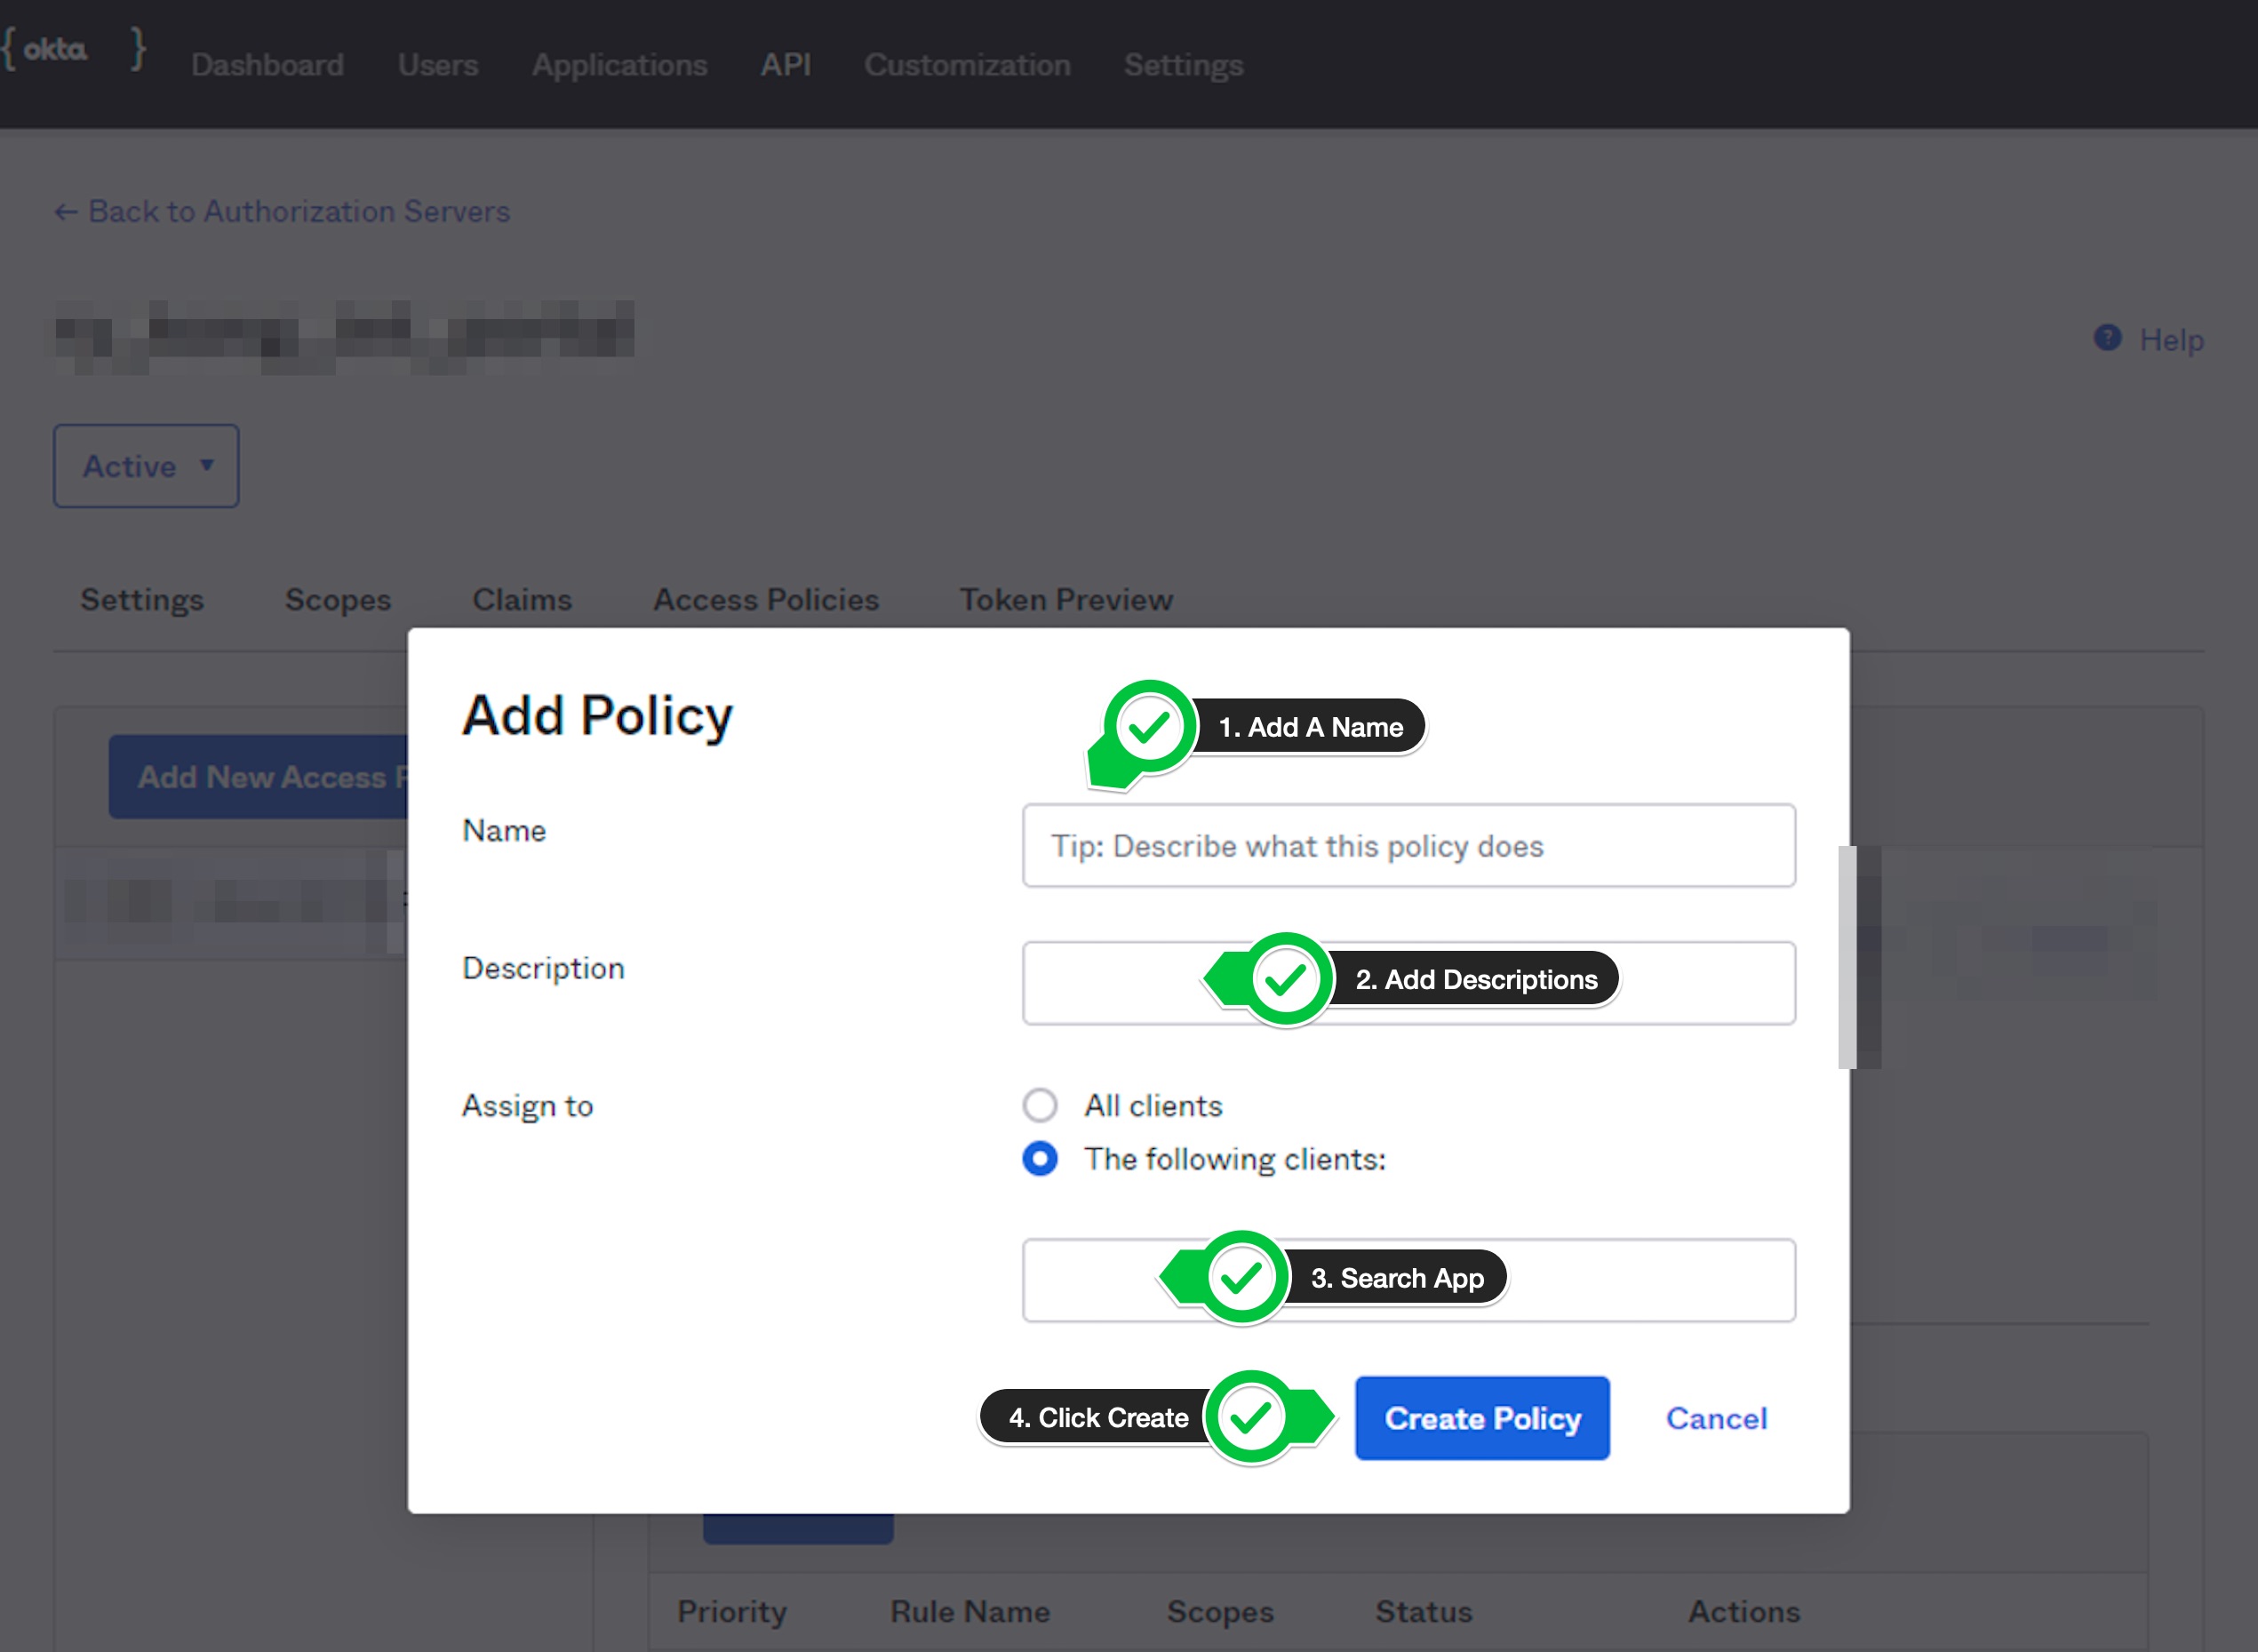
- Add a name and description for the policy. Search for the application in the
The following clientsbox which was created earlier and add the app. Once the app is added, click theCreate Policybutton.
- Click
Claimstab. - Click
Add Claimbutton.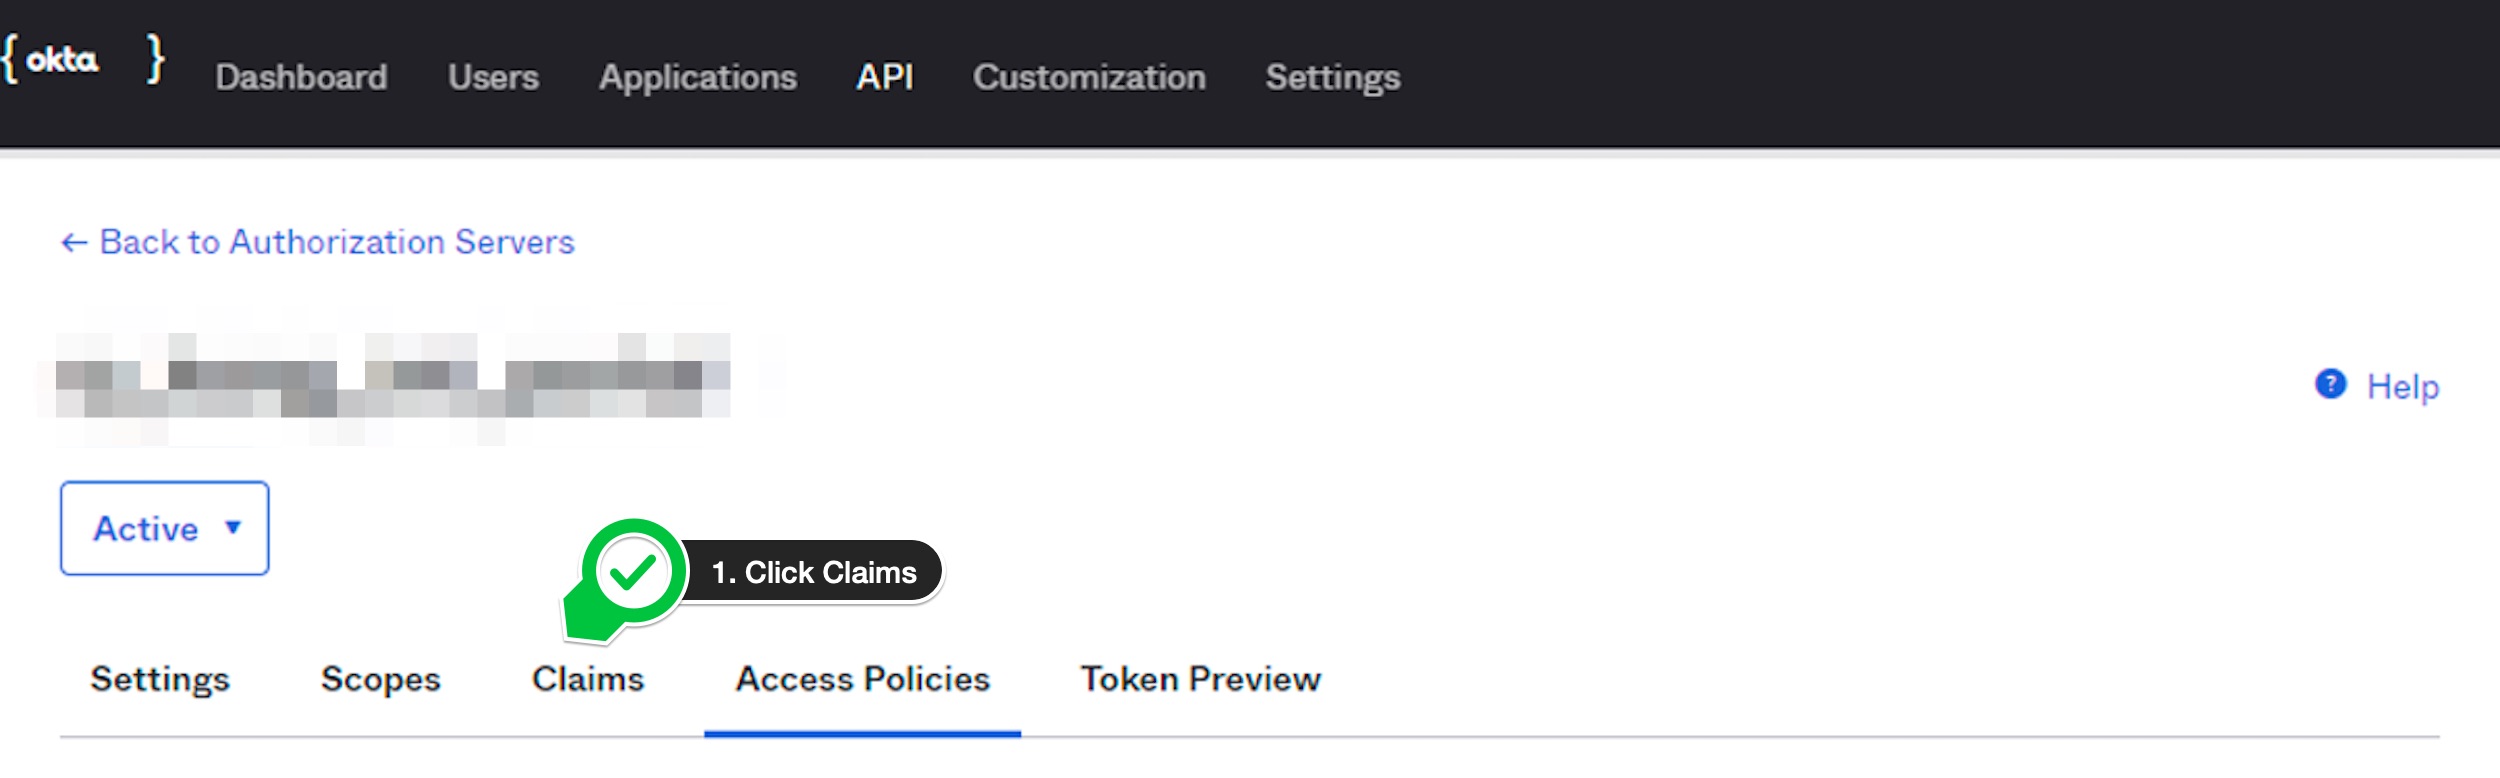
-
Fill
user.loginin name text box. SelectID TokenandAlwaysinInclude in token typedrop downs.Fill
user.logininValuetext box. Also, selectAny scopeinInclude insection and clickSavebutton. See profile attributes for more details.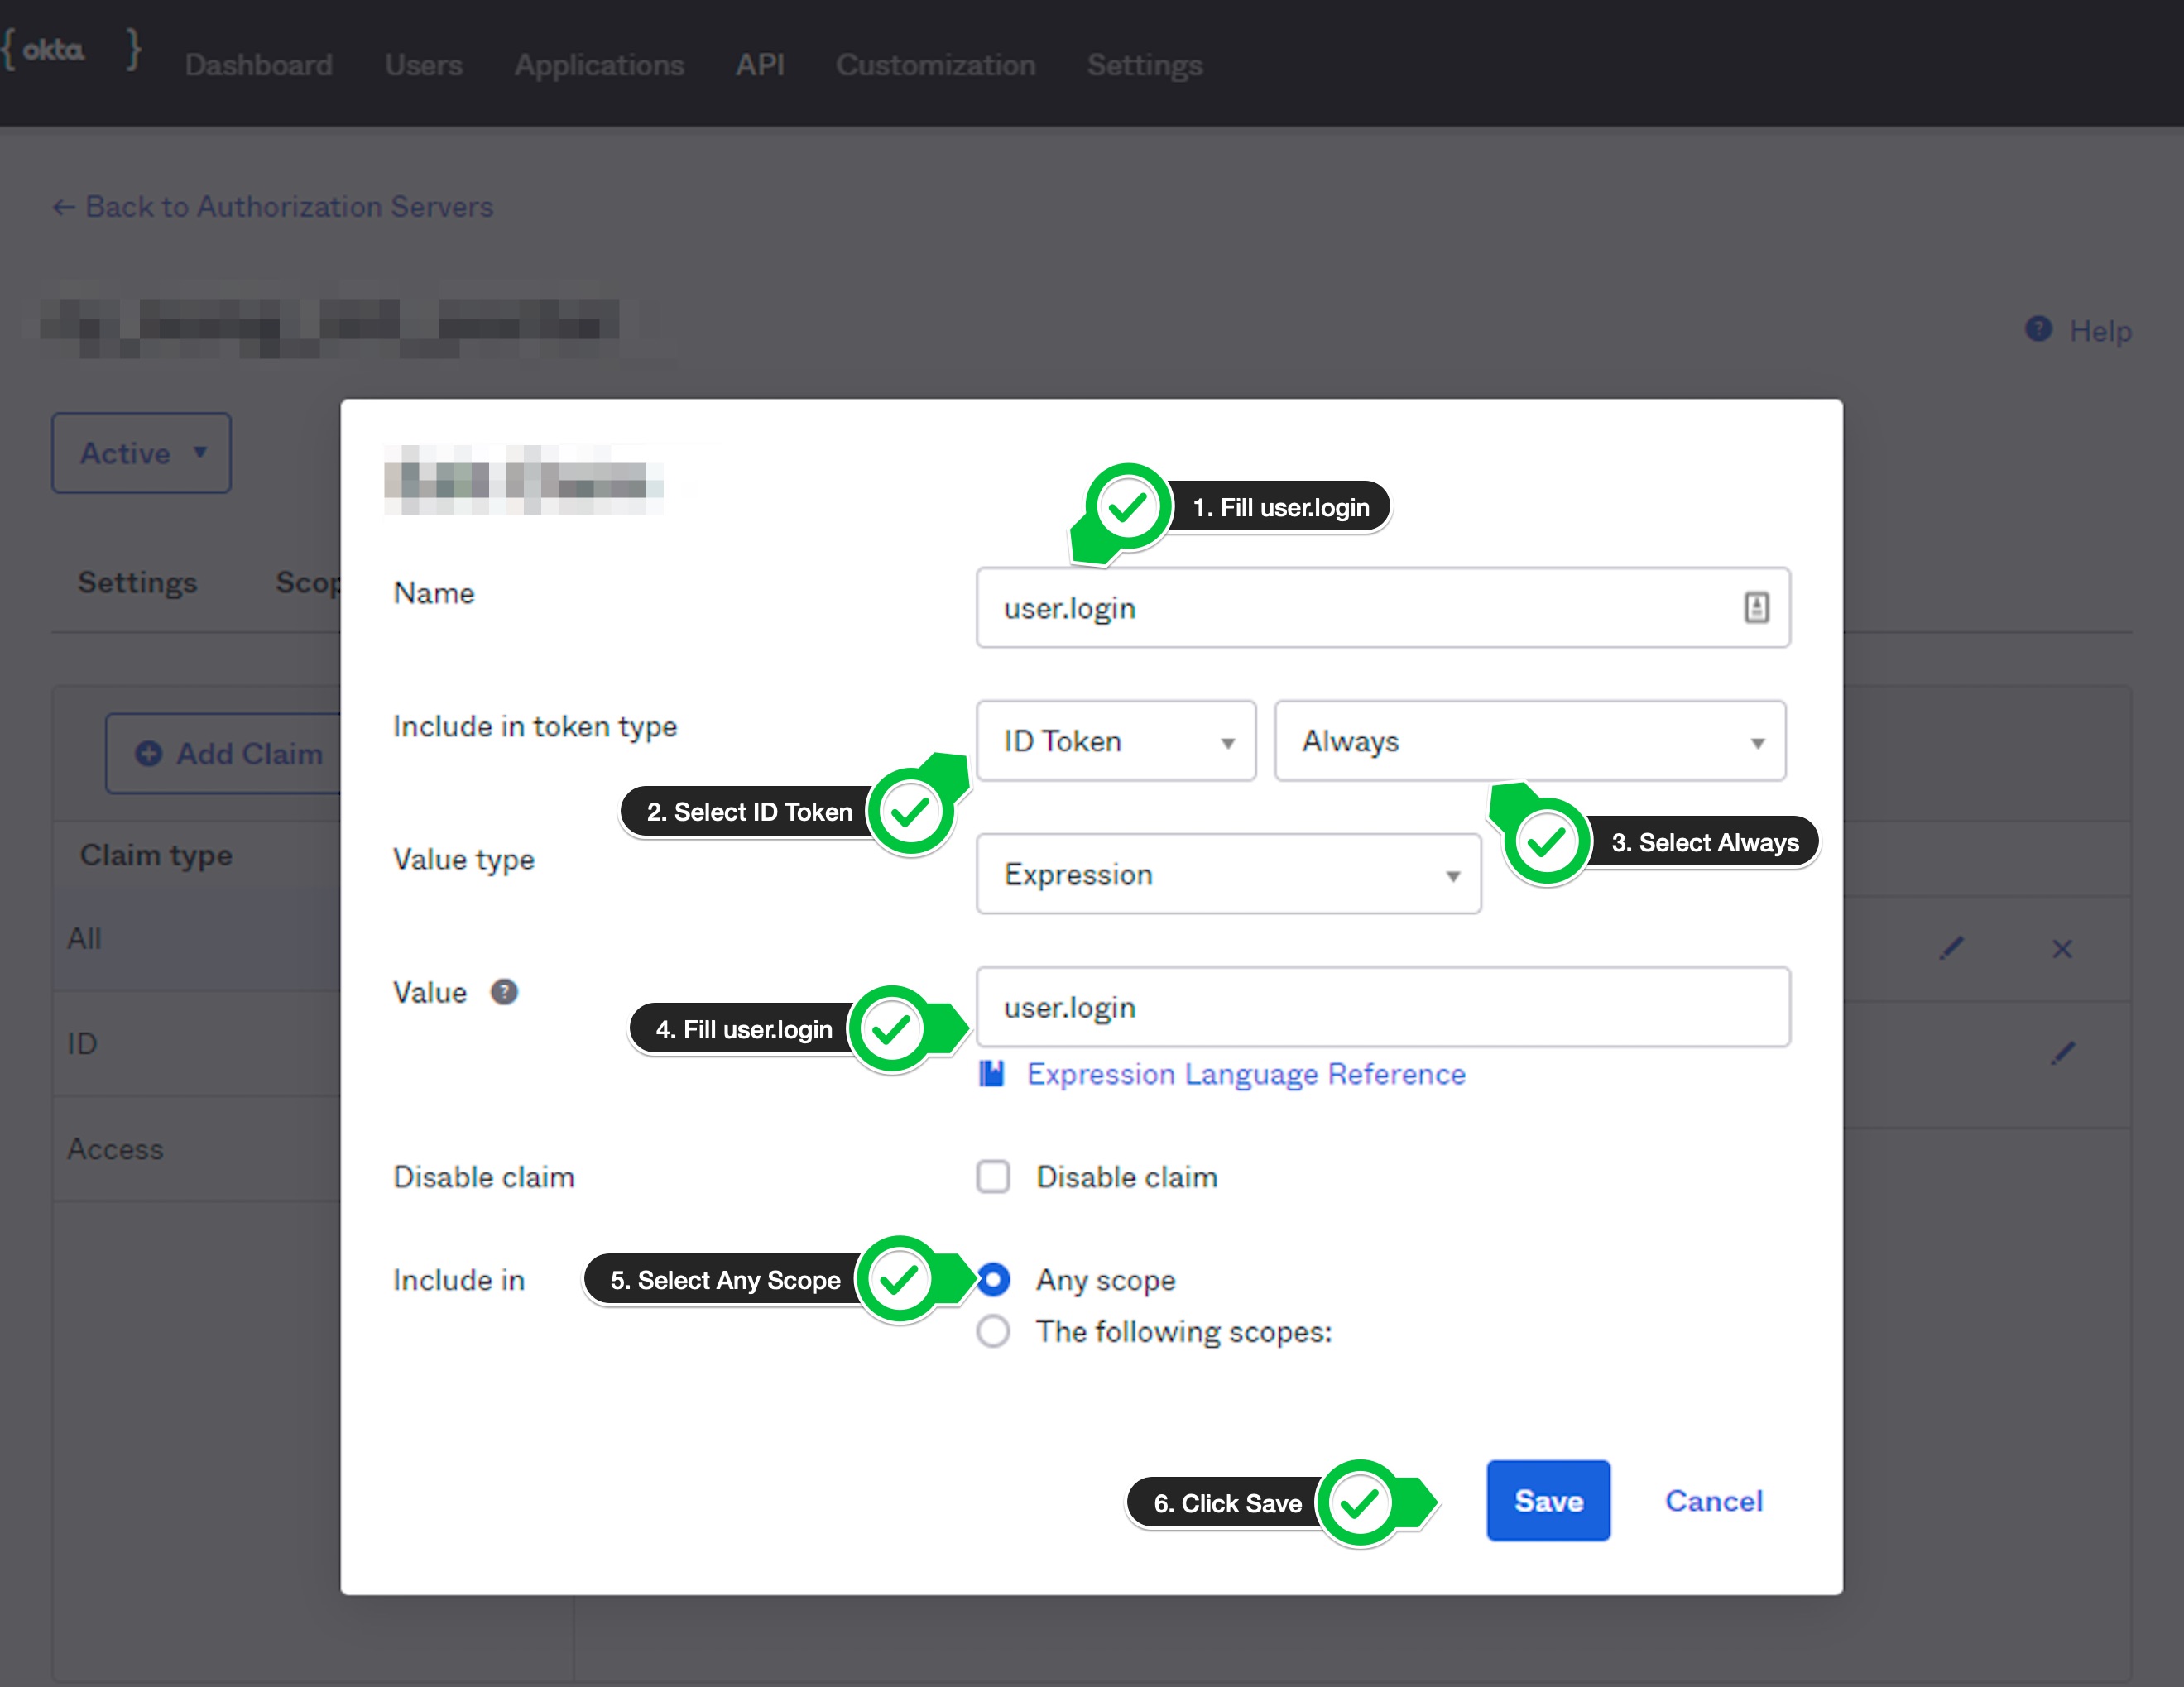
- Click
Add Rulebutton.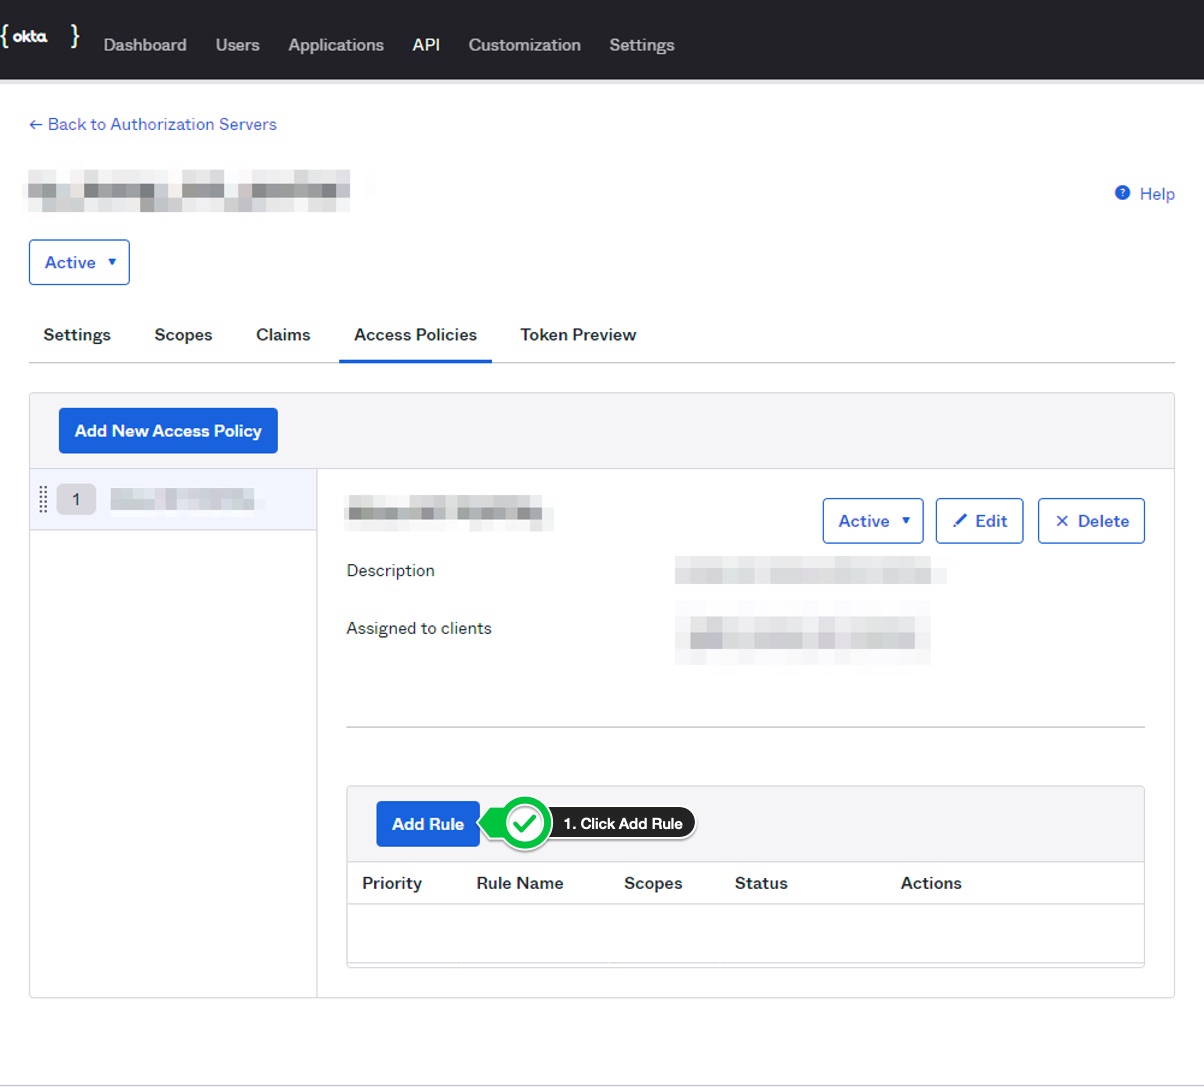
- In the modal, add the rule name. Tick only the
Authorization Codecheck box, selectAny user assigned the appandAny scopes. Click on theCreate Rulebutton.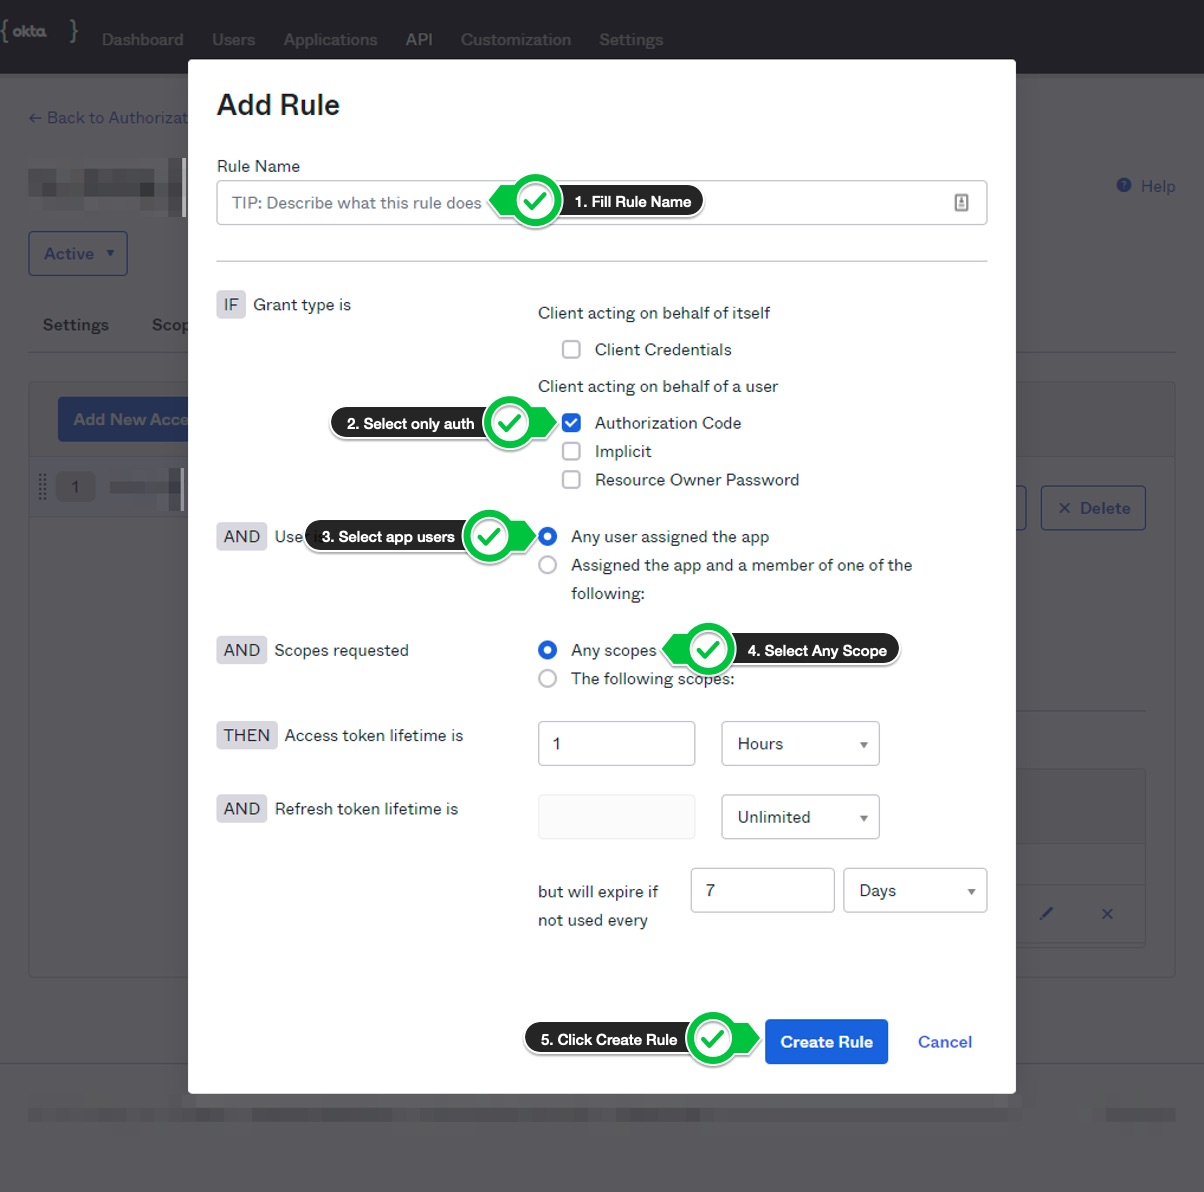
ProTip: You can update access token lifetime, refresh token lifetime and expire as per your need.
Kong Configuration
- Login into the Kong admin portal.
- Click on
OverviewinDev Portalsection, then click onTurn Onbutton.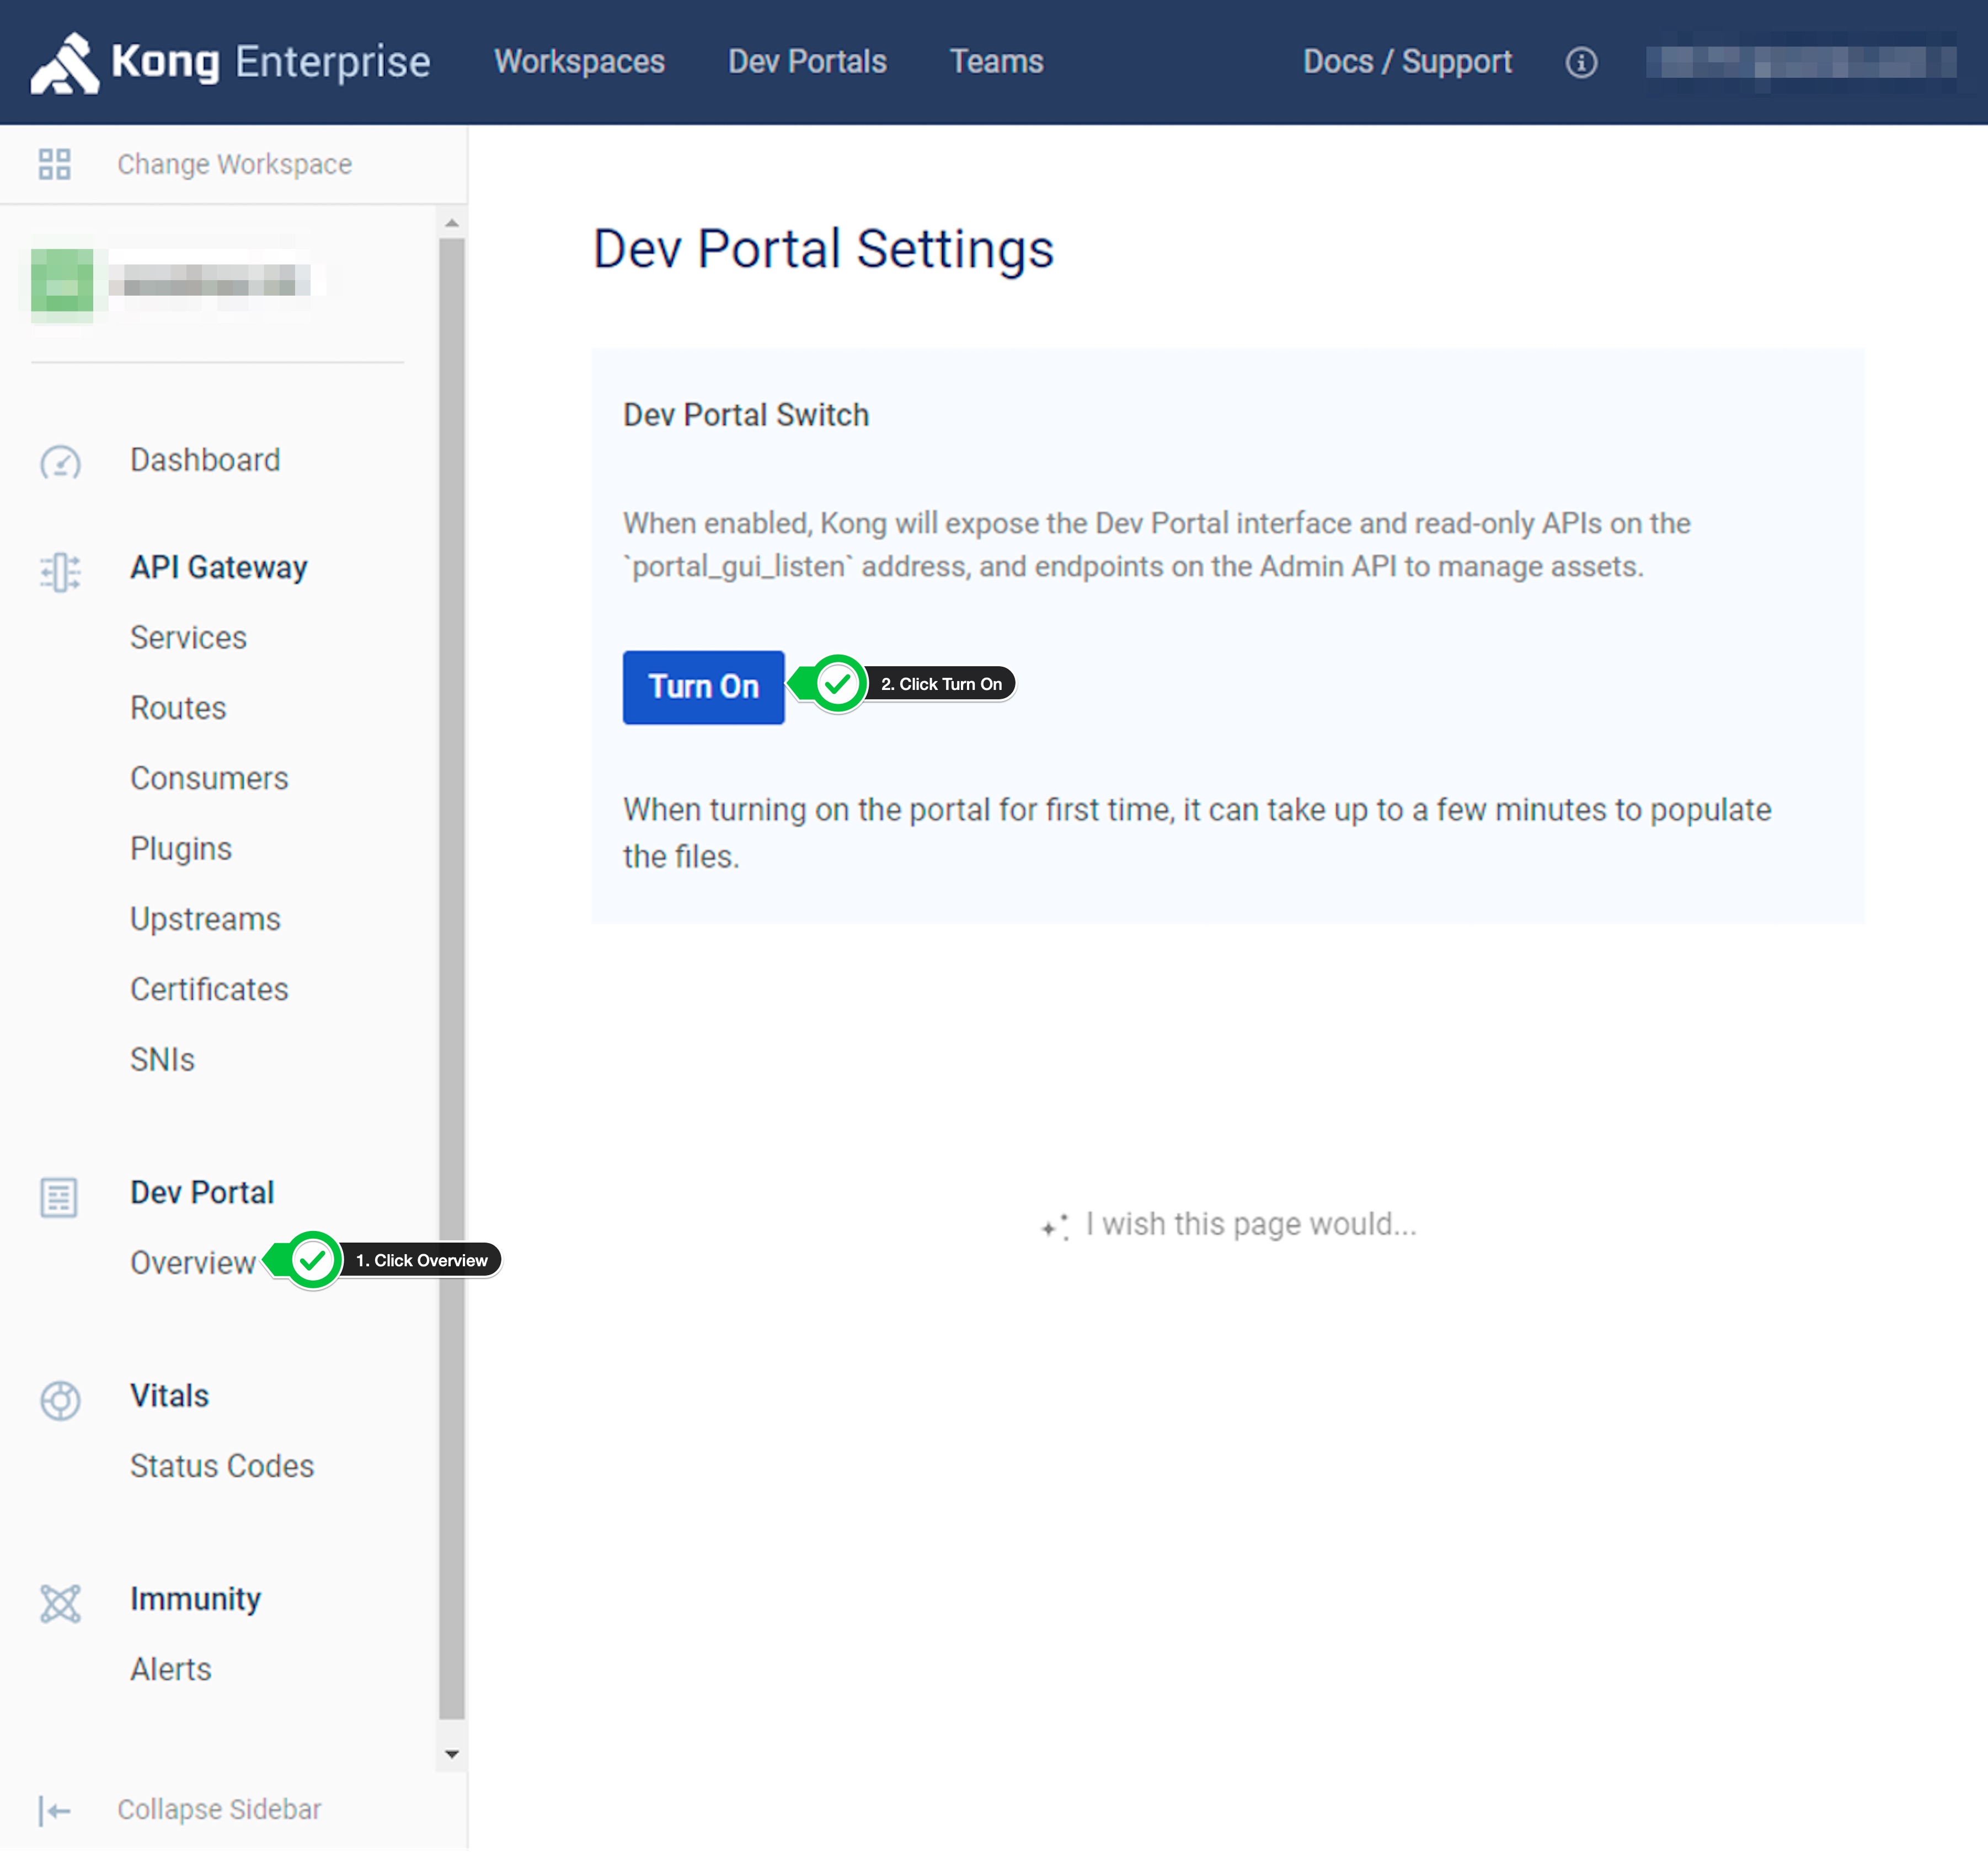
- Click on
Settingsthen click onAuthenticationtab. - Select
Open ID Connectfrom theAuthentication plugindropdown. -
Select
Customfrom theAuth Config (JSON)drop-down and paste the following config in the text area:{ "leeway": 1000, "consumer_by": [ "username", "custom_id" ], "scopes": [ "openid", "profile", "email", "offline_access" ], "logout_query_arg": "logout", "client_id": [ "<enter_your_client_id>" ], "login_action": "redirect", "logout_redirect_uri": [ "https://<control-plane-hostname>:<portal_port>/<workspace-name>/dashboard" ], "logout_methods": [ "GET" ], "consumer_claim": [ "user.login" ], "forbidden_redirect_uri": [ "https://<control-plane-hostname>:<portal_port>/<workspace-name>/unauthorized" ], "issuer": "<issuer_custom_url>/.well-known/openid-configuration", "client_secret": [ "<enter_your_client_secret>" ], "ssl_verify": false, "login_redirect_uri": [ "https://<control-plane-hostname>:<portal_port>/<workspace-name>/dashboard" ], "login_redirect_mode": "query" }- Replace
<enter_your_client_id>and<enter_your_client_secret>with actual value fetched from okta application. - Replace
<control-plane-hostname>:<portal_port>/<workspace-name>with the value shown in dev portal overview page. - Value for
consumer_claimshould be same as claim added in okta authorization server claims. - Replace
<issuer_custom_url>with the value fetched from authorization server settings.
- Replace
- Select
EnabledfromAuto Approve Accessif you want to. This is an optional step. - Click on
Save Changesbutton.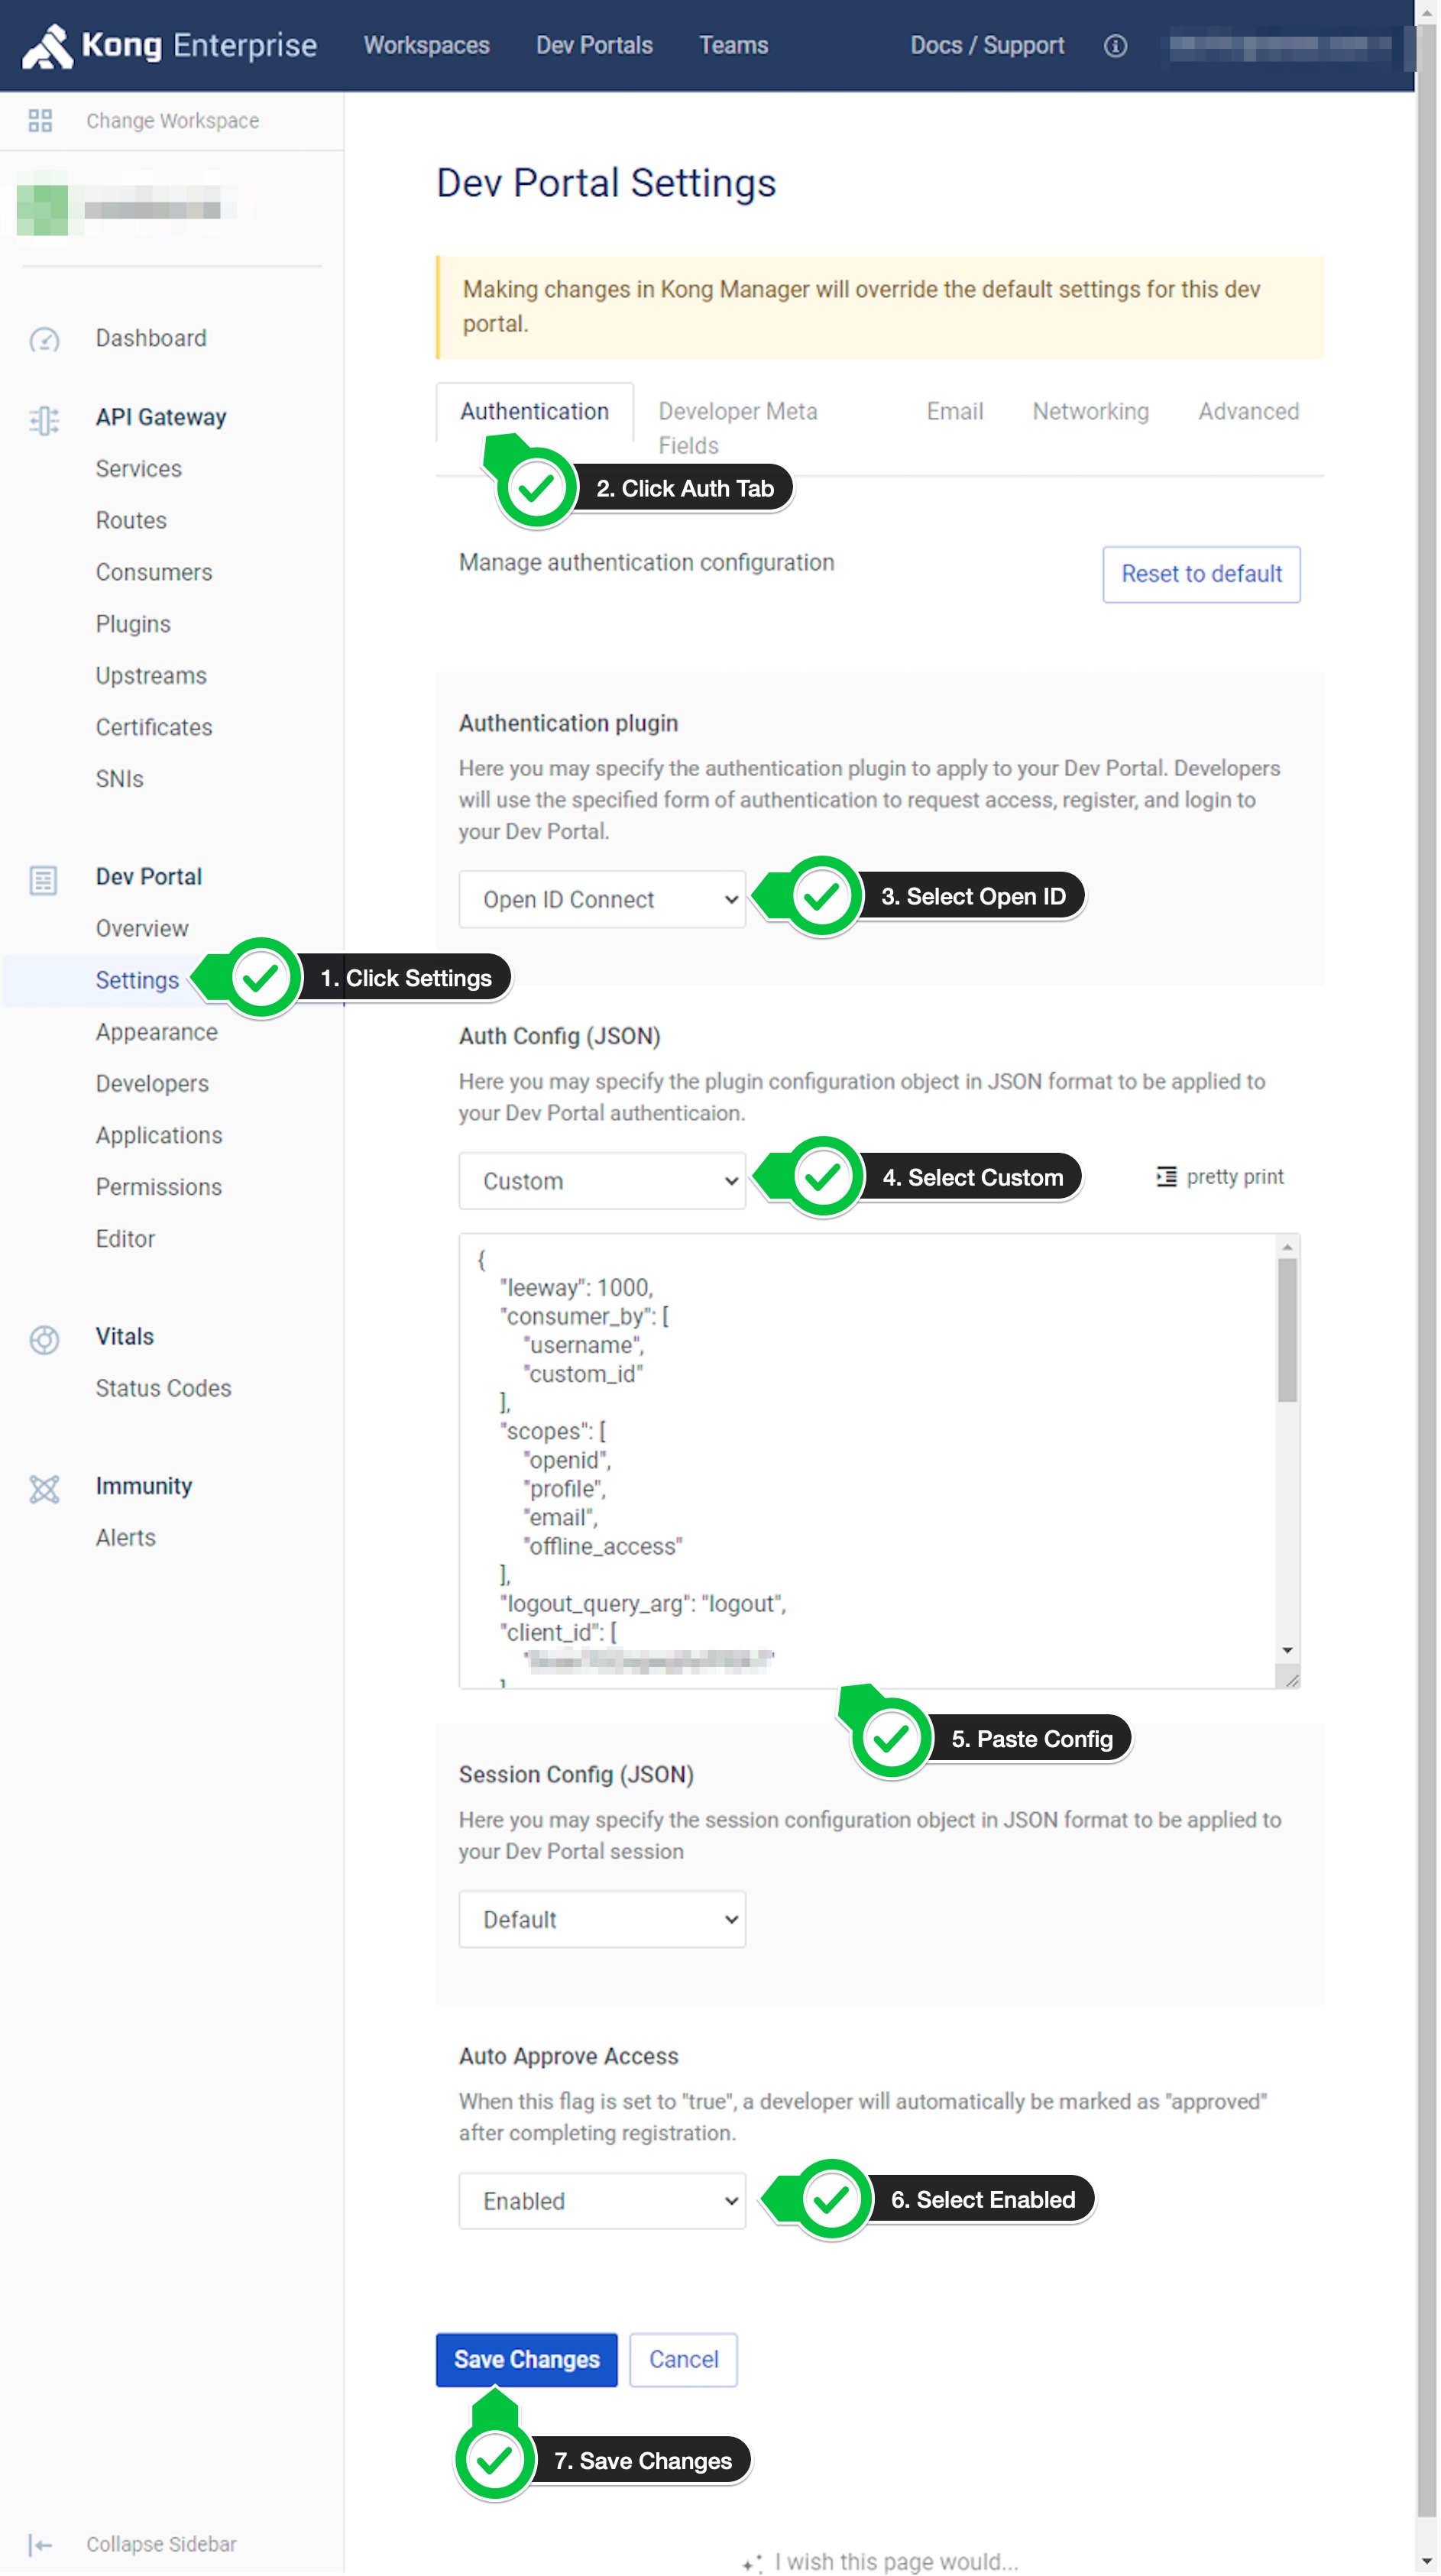
-
Click on
OverviewinDev Portalsection.Check the dev portal url and check that authentication is enabled.
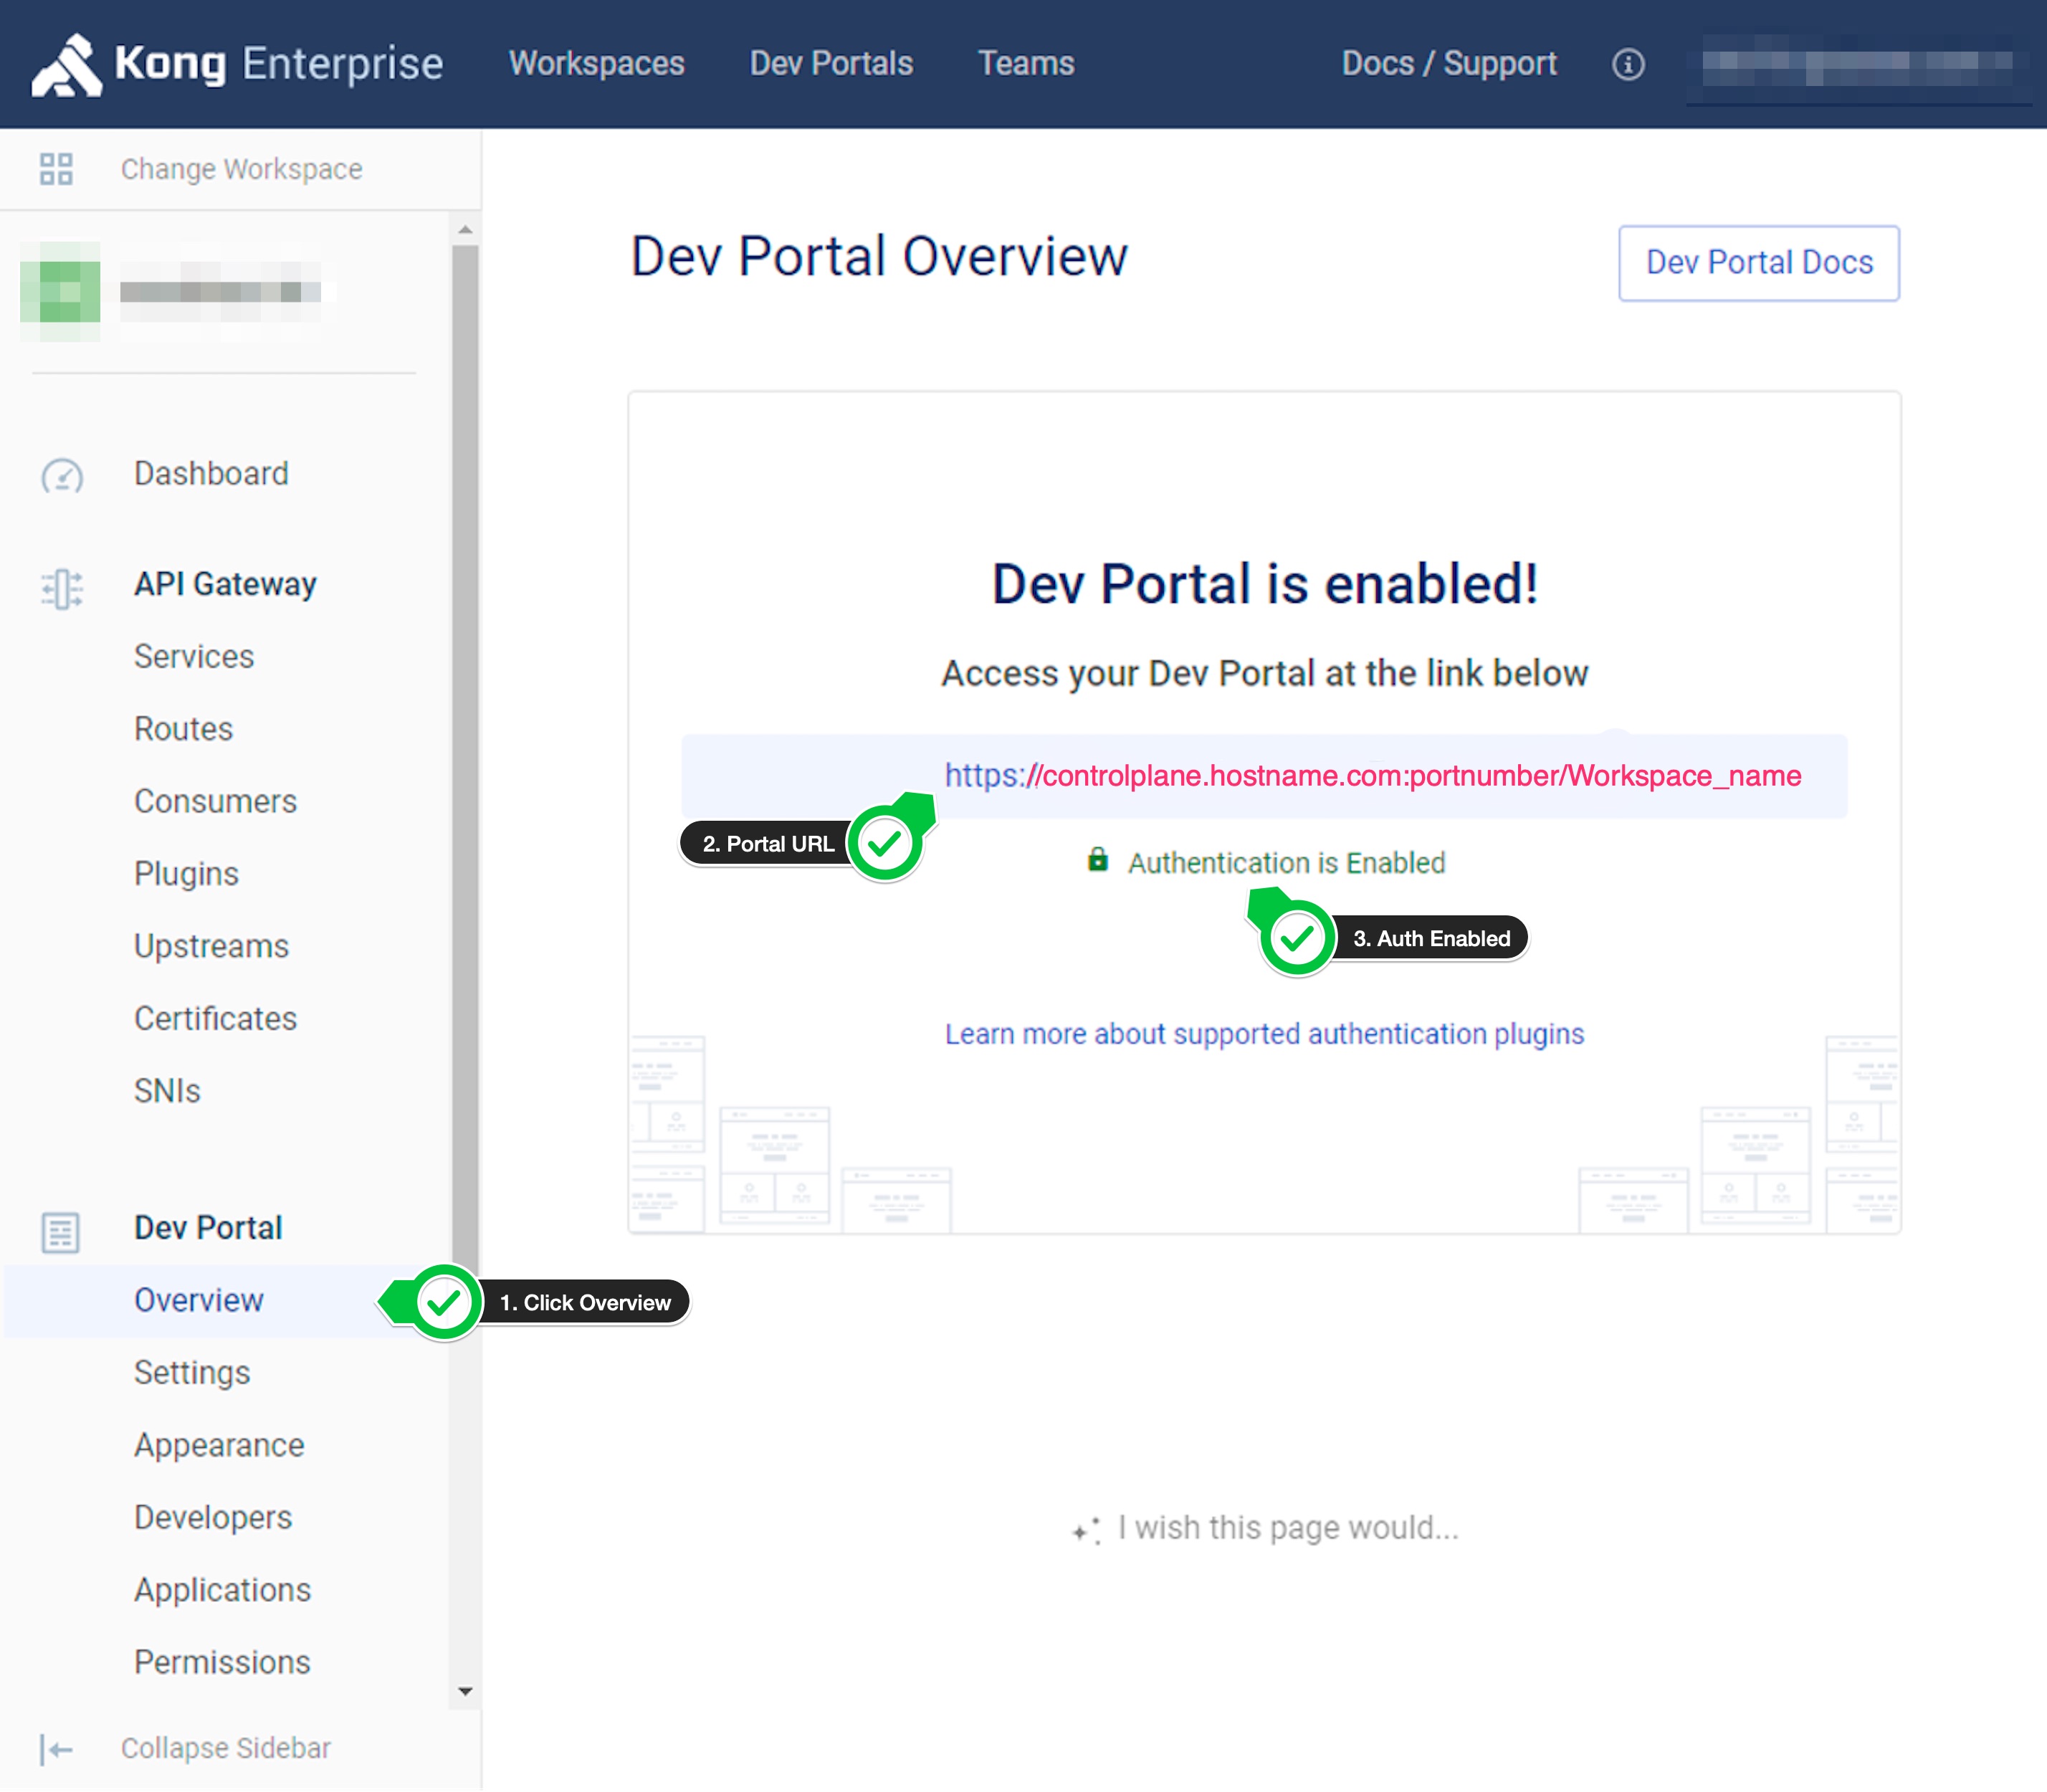
- Once the portal is enabled, you should be able to register with the okta email address. If you have auto approve enabled for the users, then you should be able to login. Otherwise, you have to approve the user, and you should be able to login.
Resources
- Developer Portal Docs: https://docs.konghq.com/enterprise/latest/developer-portal/
- OIDC Authentication: https://docs.konghq.com/enterprise/latest/developer-portal/configuration/authentication/oidc/
- OpenID Connect Plugin: https://docs.konghq.com/hub/kong-inc/openid-connect/
Hope this guide will help you set up the integration between Kong and Okta.
Leave a Comment